June 1 , 2007


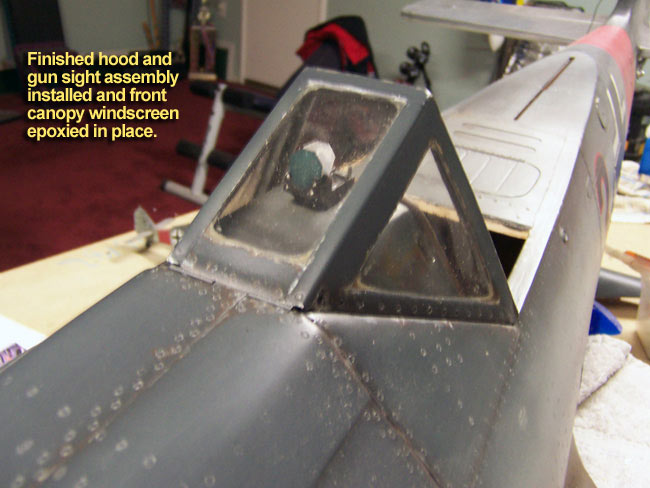
Instrument panel hood

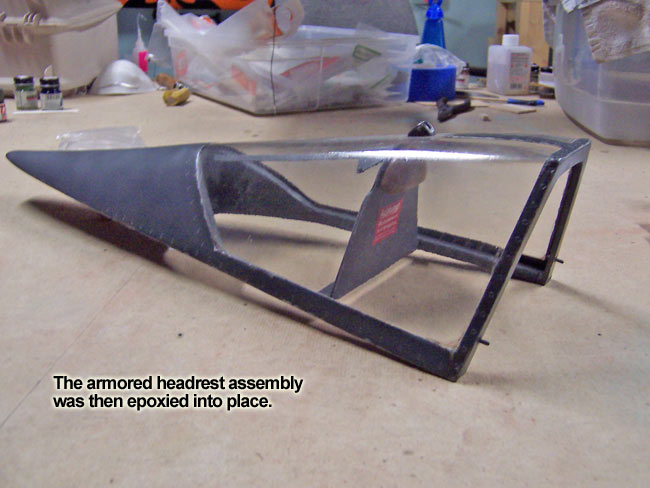
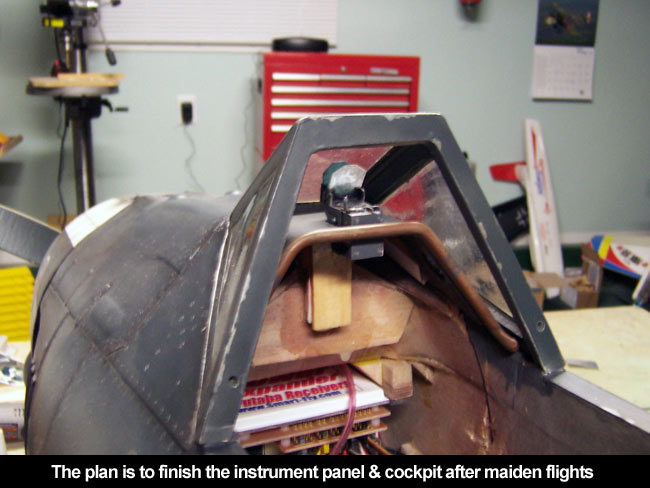
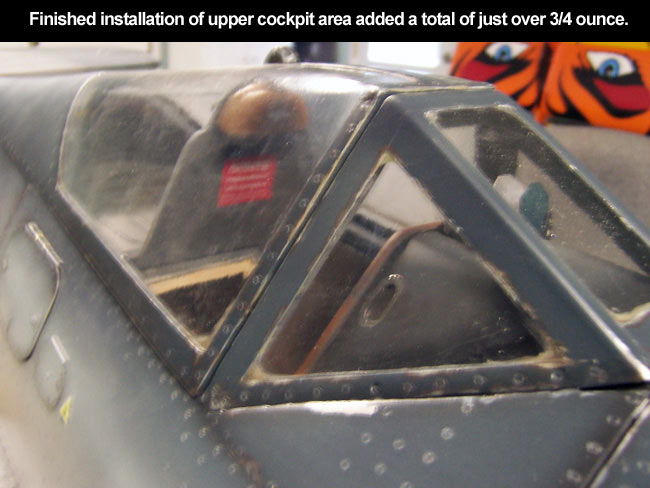
As I said earlier, I don't plan to do a full cockpit, and what I do construct, will for the biggest part have to wait until after maiden flights are done. However I did choose to go ahead and complete the details to the "upper section" of the cockpit since it would be difficult to add them later after doing the finished canopy installation. This will allow me to get in there and do my thing, then add the canopy over top of these areas.

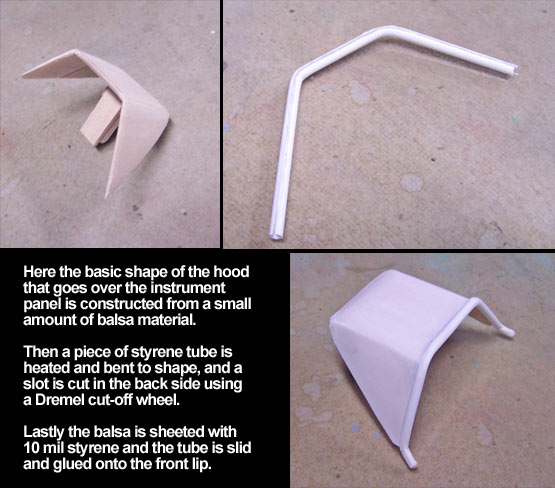
The first main part to cover is the "hood" that covers the instrument panel and reaches up forward under the canopy windscreen. The first step was to fabricate the basic shape from some light balsa stock.

Next I sheeted it with 10 mil styrene on the top side. I then took a piece of styrene tubing and heated it so that I could bend it to match the contour of the hood. I used a Dremel tool and cut-off wheel to cut a slot in the back side of the tube from end to end.

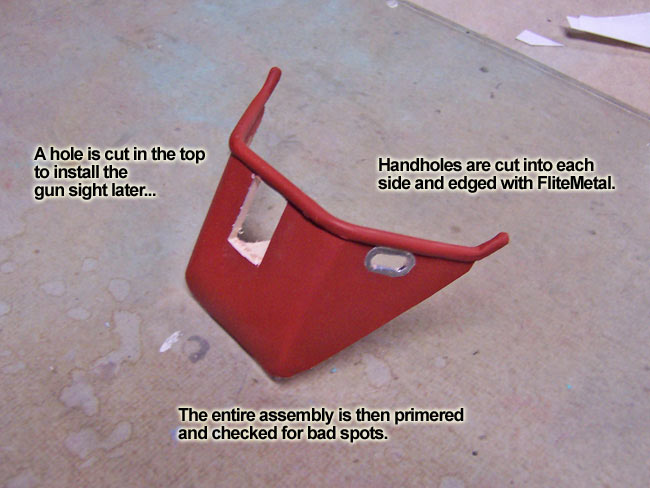
I slid the tube over the leading edge of the hood and glued it in place. Lastly I cut out two small handholes in each side of the canopy, edging them with FliteMetal. I cut one more larger hole in the top, slightly offset to the right. This hole is where the gun sight will go.

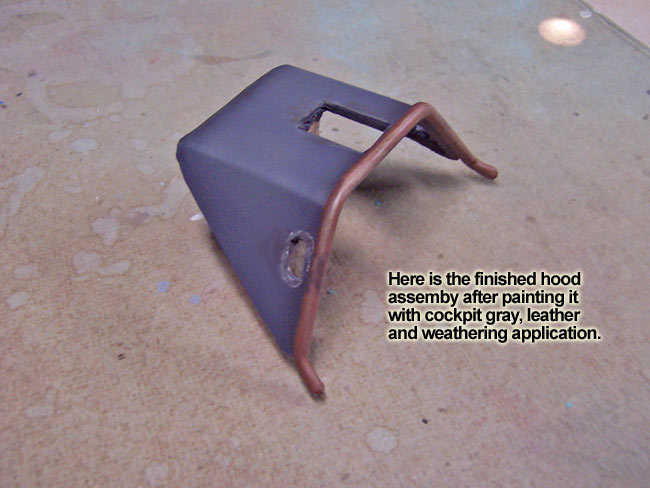
Lastly I painted the hood cockpit gray and the tube was painted leather. Everything then got some weathering/distressing and set aside.

Gun sight

The FW190 A-7 was the first variant to switch to the Revi 16B gun sight which mounts in the hood we just completed. The first step was to cut a small block of balsa to size and surface it with some of my 10 mil styrene sheet. I use medium CA glue to do this type of surfacing with Styrene.

Once that was all trimmed and sanded smooth, I then added a variety of details using styrene sheeting, rod stock and clear styrene (for the lenses). Once it was fully assembled I shot it with primer and painted it using water-based Model Masters acrylics.

With a little weathering and highlighting it was pretty much complete and ready to install. I set it aside at this time and moved on to the headrest.


Armored head rest

The main armored plate that makes up the majority of the headrest assembly was fabricated from a sheet of 1/16" balsa cut to shape and sandwiched between to sheets of 10 mil styrene sheeting. I added a 1/4" balsa stick across the back at the bottom edge and surfaced it with styrene as well. This isn't exactly scale but adds a lot of stability to the panel and gives me something strong to glue to the canopy and tie it all together.

The actual headrest was shaped from a balsa block and coated liberally with epoxy. Once dry, I sanded the epoxy smooth, added a little spot putty to any bad spots, sanded again and primered.

The rear support rod was made from a piece of styrene "L-channel" and a little bit of styrene details. This glued to the back of the headrest panel securely. After painting the panel cockpit gray and the headrest leather, I added the large red decal and shot a couple light coats of clear to seal the decal in.

Lastly the whole assembly is epoxied in place inside the rear sliding canopy section and left to dry. That's pretty much it for the rear canopy, all that's left is to lock it back into place on the fuse.

Installation

The only thing left to do here now is epoxy the front windscreen into place and reattach the sliding canopy. The photos below show the finished cockpit detailing of the upper section after installation.

This should all really come together once the instrument panel and rest of the cockpit is done, but for now this will have to do. Surprisingly, I was able to do everything shown on this page with a total weight of about eight tenths of an ounce. This would need to be offset in the nose when balancing, so it actually will end up costing me a total of about 1.6 ounces to the all up weight. Now I need to wait until I've gotten my maiden flight in before I decide how much and if I finish up the cockpit area.

Stay tuned...


| Scout Recon | Building the 190 | Paint & Detail | Cockpit | On Patrol |

back to tompierce.net - rc planes