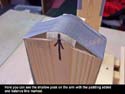
Balancing
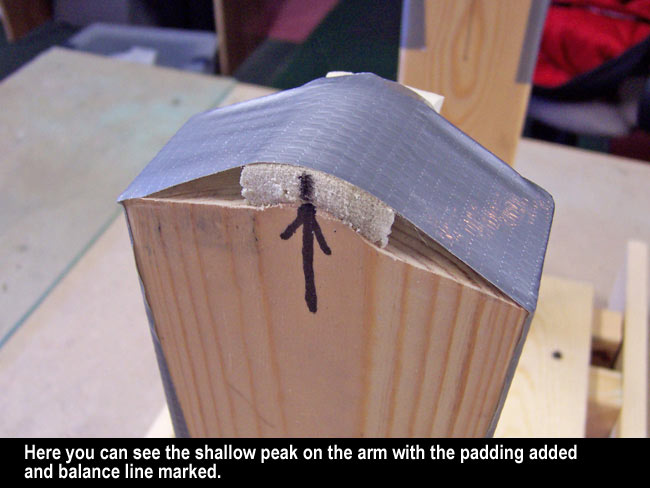
With this plane completely built, there were still some issues that needed addressed before a maiden flight would be in order... the first of which would be balancing. There are a number of methods for checking the CG of a plane, some of which don't work very well for such a large and heavy plane. I chose to make a custom balance stand constructed from pine 2x4's as shown below. The riser arms on each side were shaped to give me a peak that would act as the actual balance point. I covered these points with some thin padding to avoid damaging the wing when it is set on the stand. I also marked the exact center of the peaks with a magic marker so it would be easy to align it with points on the wing.
After assembling the plane to a ready-to-fly state, I placed it inverted onto the stand. I had previously place tape on the wing and marked the tape where the proper CG points on each wing were. I simply needed to align these points on the wings with the points marked on the balance stand risers.
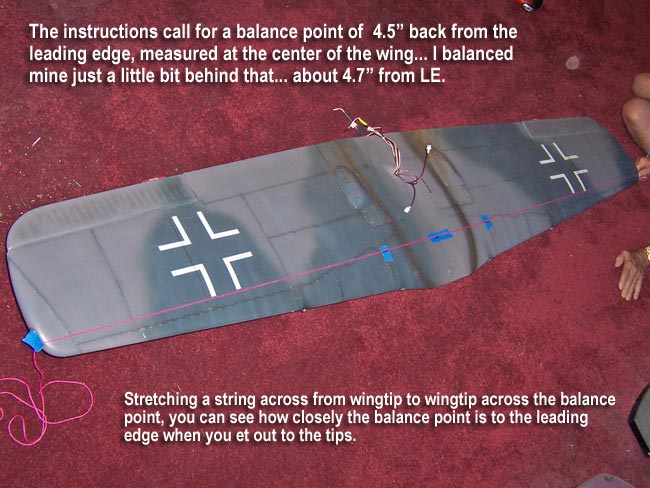
The instructions called for a CG balance point of 4-1/2" from the wing leading edge, measured at the center of the wing. After placing the plane on the stand, I found it to be quite tail heavy (unfortunately). Adding weight to a spot right at the leading edge of the engine cowl, I eventually got it to balance. The bad news is that it took 2lbs - 14oz to get it to balance! I can't understand why, as I have used a heavier engine than suggested and did everything I could to keep the tail light (within reason). It was a moot point, since I have to get it balanced as it is now, regardless of the reasons for it being this way.
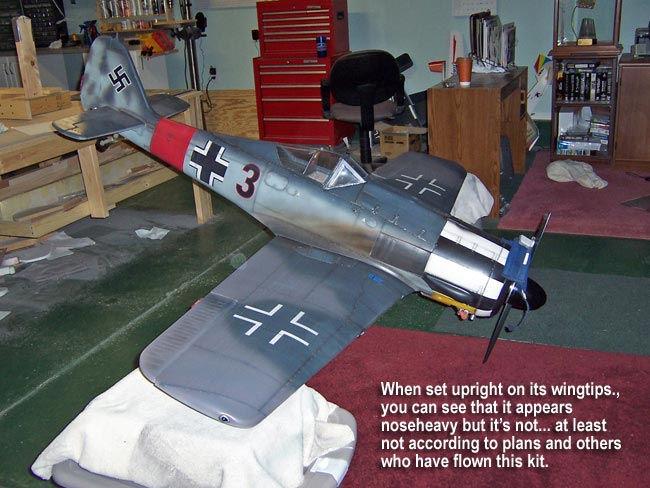
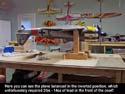
The odd thing was that setting the plane on its wing tips in an upright posture made the plane "appear" to be extremely nose heavy. When I set it on the wing tips on two boxes, it nearly flipped over onto it's nose! I then stretched a string from tip to tip right across the wing to see exactly what the balance line was across the wing (as shown above). It does in fact show it balancing across the correct spot at the center of the wing, which due to the sweep of the wing LE, brings the balance line nearly to the LE by the time you get out to the tips.
I think one of the things that really aggravates this situation is the extremely forward position of the CG that is called for in the instructions. When you check it against the Mean Area Chord of the wing, it comes up a little over 20% back on the wing, which is quite far forward. I have many giant scale planes that are balanced properly with no nose weight, but if I tried to balance them at 20% back they would require a ton of weight. Admittedly, this is no 3D/Sport plane, so I understand the need for a much more forward CG, but don't understand why it needs to be this extreme? At any rate, I'll follow the instructions to be safe.
To do the actual final balance, I epoxied enough lead into the inside of the engine cowl, right behind the face ring of the cowl, weighing it until it reached the proper weight required. Once cured, I re-assembled the plane and put it back on the balance stand to verify proper balance. I ended up with it just a tad behind the targeted 4.5" (maybe 1/8 to 1/4" behind), but feel that this is adequate. The sad part is that this brought a 24lb ship up to just under 27lbs RTF... not much I can do about it. It should be fine though, I know of others who are successfully flying the Devine 190 at the same weight. Obviously I'll have to be very careful and keep my speed up. This also may affect the choices I make when/if I decide to begin detailing the cockpit. |