|
Finishing up the Windscreen Section
In this section, I'm going to finish up everything under the pilot's windscreen. This includes the instrument panel, reflector gun sight, the surrounding "dash structure" and finishing off the two 50 cal nose guns I started earlier. I'll start out with the instrument panel...

|
Building up the Instrument Panels
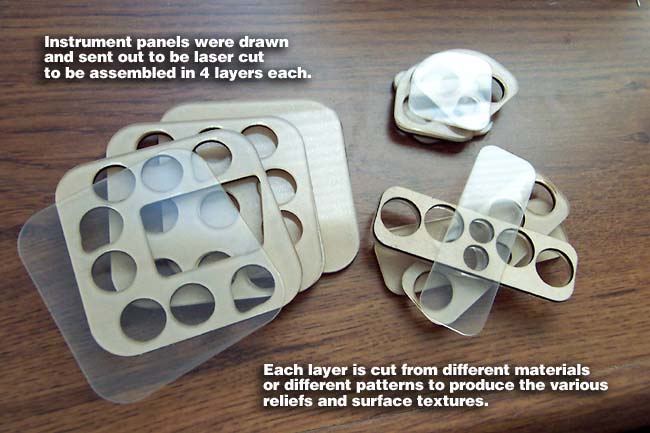
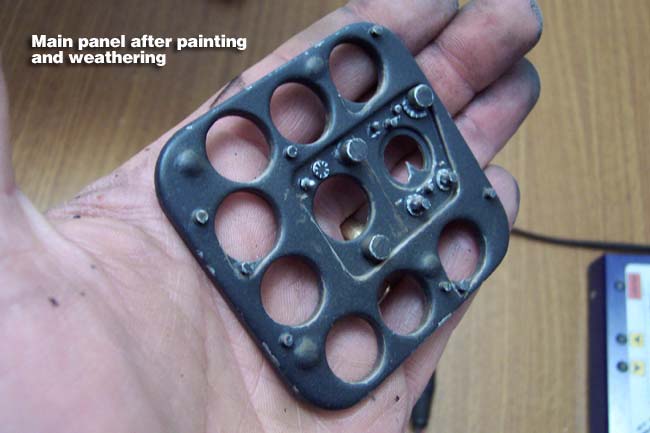
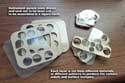
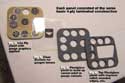
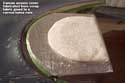
The SBD uses a stamped steel instrument panel with recessed gauges, not bezel plates. So, I first laid out my instrument panels using Adobe Illustrator on my Mac. I designed them so that they each panel is actually 4 laminated layers. This allowed me to have each layer use a different pattern, thereby giving me the various reliefs that I needed. I then sent them out to be laser cut from plexiglass, ply and clear styrene. Laser cutting was done by Chad Veich. I chose the appropriate material for each layer depending on what "task" I wanted it to perform, in addition to just building up the thickness I needed.
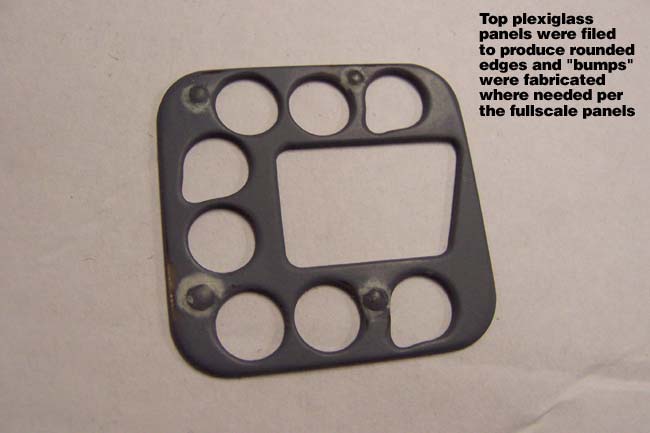
I had to file & sand the edges of the topmost layers so that I could replicate the rounded edges that were on the SBD, rather than sharp laser edges. I also fabricated some of the "bumps" that were stamped into the SBD panel, not sure what they're for... just needed to copy them.
I used a J-Tec instrument panel print set to get as many of the gauges as I could. Those that weren't in the set I acquired from various sources and friends, and printed them out on a laser printer. These were glued to the bottom most layer. The next layer "up" from that is the clear styrene layer, which provides the glass lenses for all gauges. Next up, are the two upper layers that combine to make the stamped steel panel front.
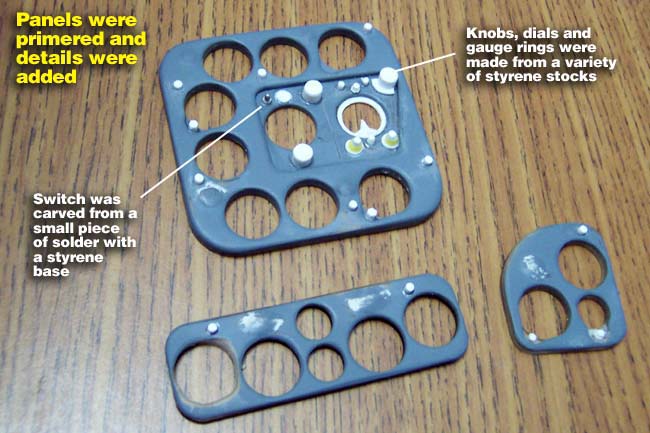
Once everything was primered, I fabricated a variety of knobs, dials, rings and details from styrene stock. The only "switch" on this panel was created by carving a piece of solder, and adding a styrene base.
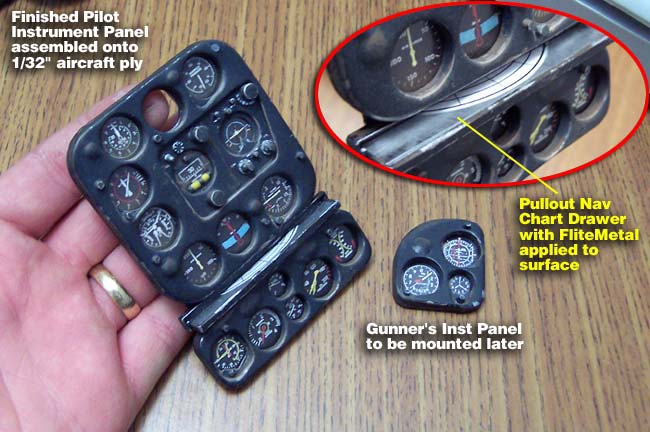
The pullout navigation chart drawer was made from styrene and surfaced with FliteMetal. Everything got painted, weathered and clearcoated and layers glued together. The upper and lower panels were combined together onto a piece of 1/32 ply to be glued into the plane later.
|
|
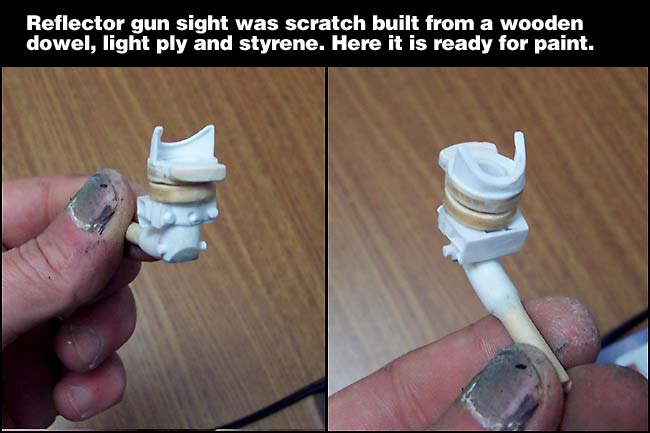
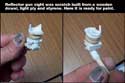
Making the Reflector Gun Sight
The reflector gun sight for the SBD acts much like a modern day "HUD" device in military planes. No rocket science here, just more styrene fabrication. I started out with a wooden dowel rod and built up the structure and details from styrene and a little lite ply.
Once the basic structure was built, details were added and it got the primer treatment. I surfaced the two areas that needed to be a natural metal finish with FliteMetal and stamped in some screwhead details. Next I painted and weathered the whole unit, sanded the paint back off the FliteMetal, and added the glass lense from clear styrene.
I later drilled a hole in the cockpit former of the fuse so I would be able to epoxy the dowel rod into the hole for strength.
|

|
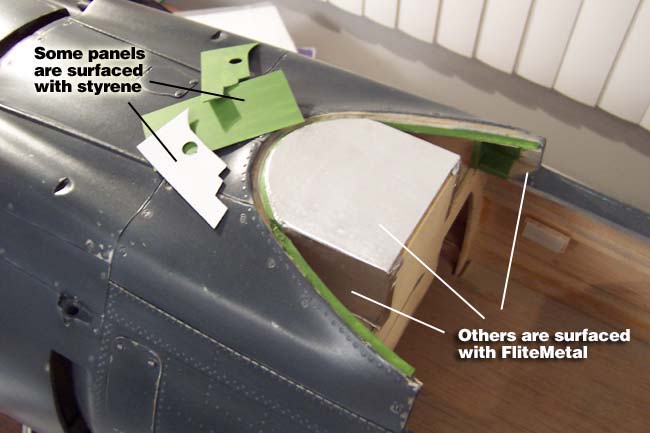
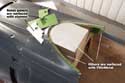
Surfacing the Surrounding "Dash" Structure
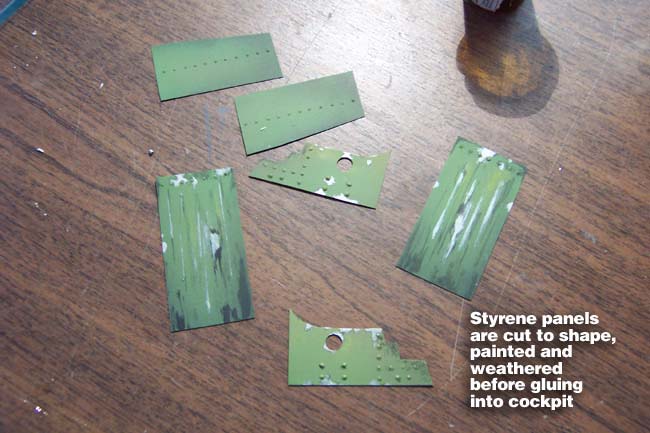
The entire surrounding "dash" structure still had to be surfaced. This was done with either FliteMetal or styrene, depending on shape, size and accessibility of the area to be surfaced. Much of this area was done as individual sytrene panels that were painted and weathered "offline" before gluing them inside the cockpit. The FliteMetal really helps to get areas surfaced quickly without having to coat with resin, dry, sand, etc..
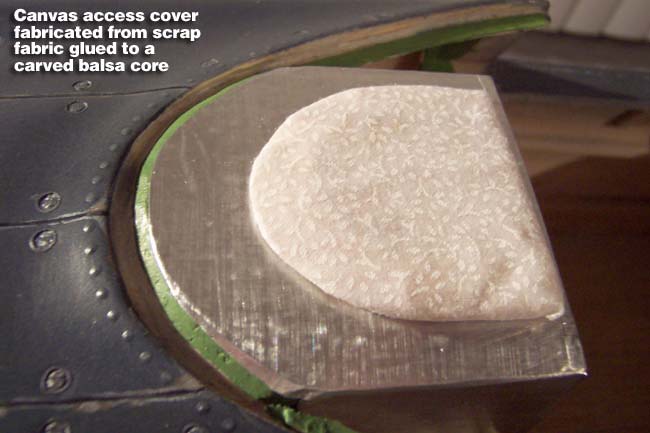
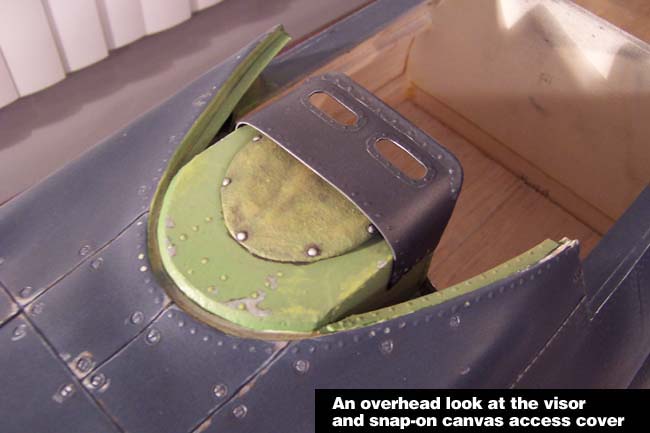
There is a snap-on canvas access cover on the top of the SBD instrument panel area, which I fabricated by gluing some scrap fabric onto a balsa plug. I then saturated the fabric with CA and primer to get the proper texture.
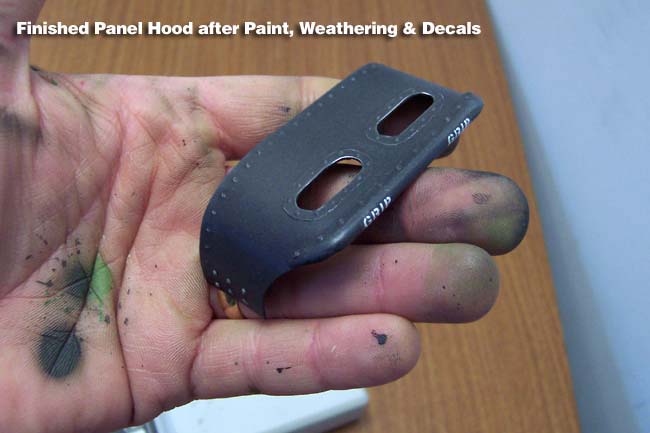
There is a visor/hood fixture that covers the canvas area, I imagine to keep glare off the gauges in flight. I heated some styrene to bend it to shape, cut out holes, added FliteMetal, rivets, etc. and painted. Everything got weathered but not clearcoated and all panels were glued in place.
|
|
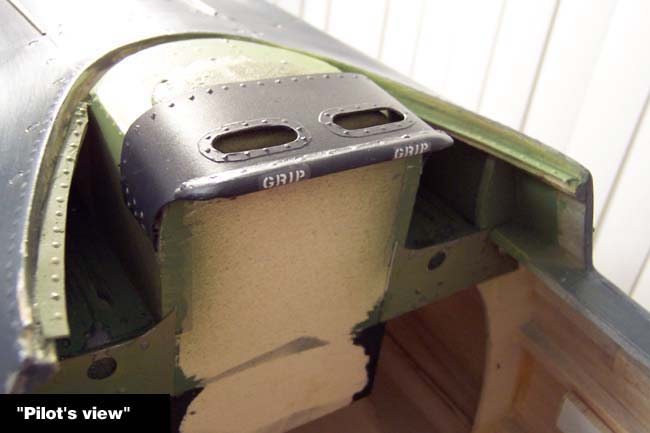
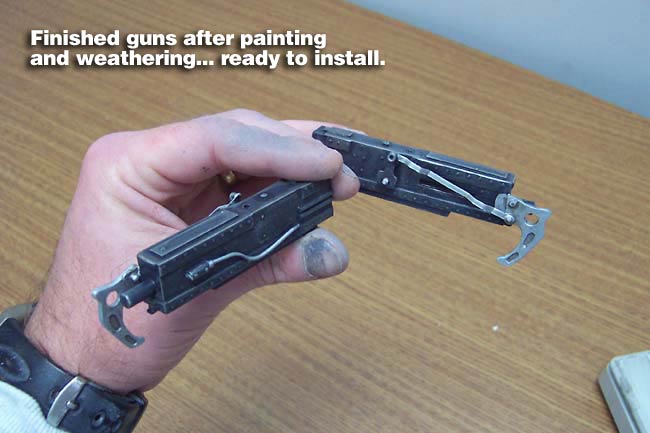
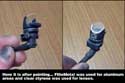
Finishing up the Two 50 Cal Nose Guns
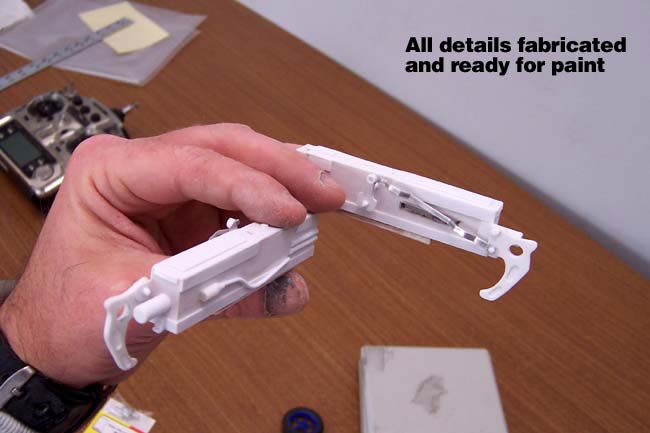
I had already built and installed the barrels of the two 50 cal nose guns previously, but still needed to do the breech section that is visible in the cockpit. This started out as a couple balsa blocks cut to shape/size.
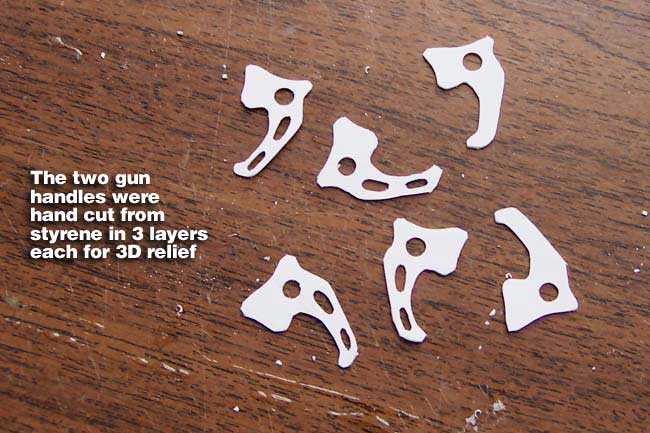
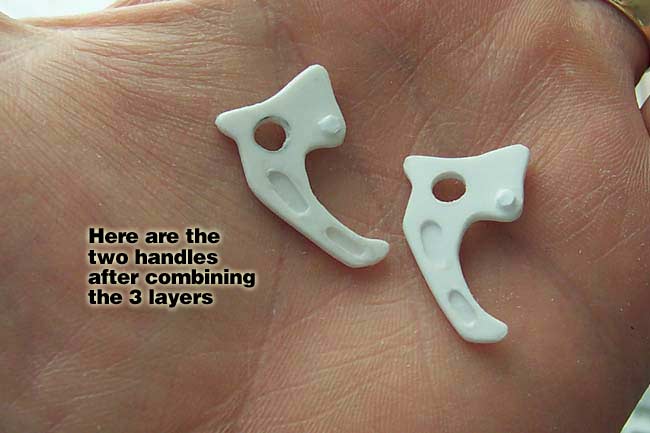
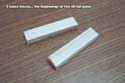
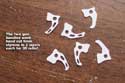
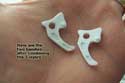
Next I hand cut the two handles as 3 layers each, to laminate them into proper 3D relief. I then did the usual surfacing and detailing of the two guns with styrene stock. I also used a thin strap of aluminum bent to shape for a detail on one side of each gun.
Once all the details were finished, I primered both guns, painted them and weathered them. I shot some Nelson's clear on them too to get the finish I wanted.
|
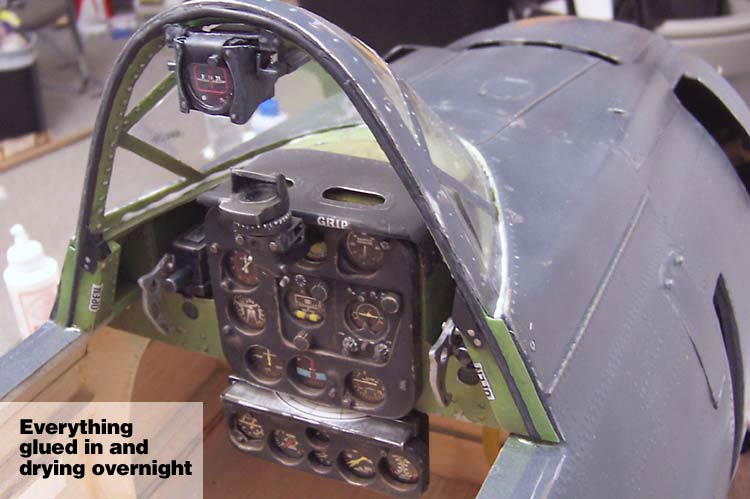
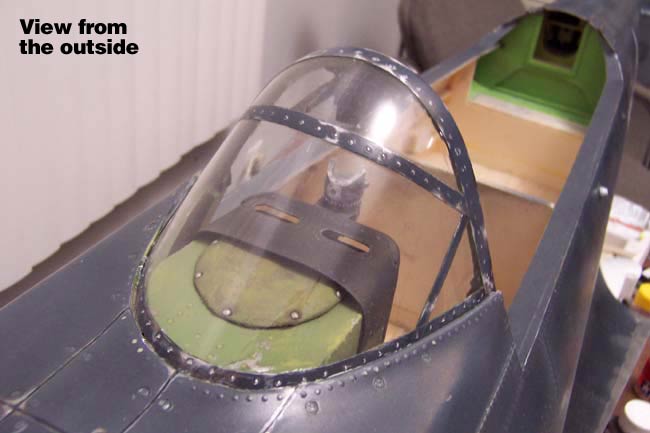
Final Assembly & Installation
With all components fabricated and painted, I was ready to install them into the cockpit. I epoxied the instrument panels, reflector sight and two guns in place. I used RC56 canopy glue to glue the windscreen in place and left all to dry overnight. So far so good, still a lot of cockpit that "still ain't green!"

"Pilot Cockpit Floor"
|