|
|
 |
|
|
|
|
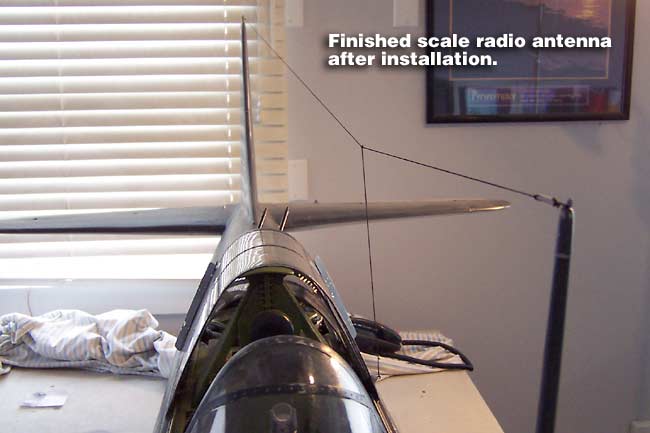
Static Radio & Radar Antenna The SBD has three antenna that I still need to add. The first is the scale radio antenna, which I already started back in the "Construction" section. It consists of an antenna wire coming out of the center radio section of the cockpit, extending upward to a longer line which stretches from nose to tail of the plane. The most visible portion is the wooden mast on the top left side of the fuse, just in front of the windscreen. This mast connects the long wire between the nose and the top of the vertical fin at the tail. The other two antenna are the dual Yagi Radar antenna. These antenna array each look like the old style TV antenna that those of us old enough to remember used to see on every roof top. There are two of them, one on each wing, hanging down below the wing, about 2/3 of the way out to the end. Below I will cover my fabrication steps for all of the above mentioned antenna.
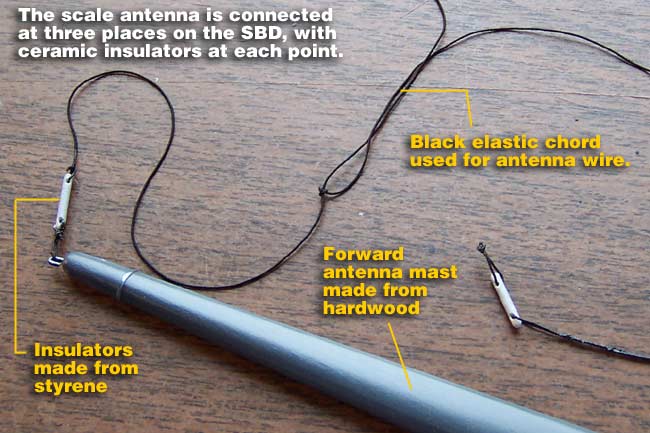
Scale Radio Antenna As I said above, the radio antenna had a large wooden mast at the front of the SBD. To see how I fabricated it, and made it removable, click here. At this point, I simply needed to fabricate the actual antenna wire itself, and all associated connecting points. The scale antenna wire was made from a piece of thin black elastic chord, with a loop tied at each end. The loops were used to connect the chord to the three points on the plane, again making the entire antenna removable. Also at each end of the chord, the SBD has a ceramic insulator in the line, which I maded from styrene. The competed antenna forms a "T" shape going from the center of the plane up to the long end-to-end wire.
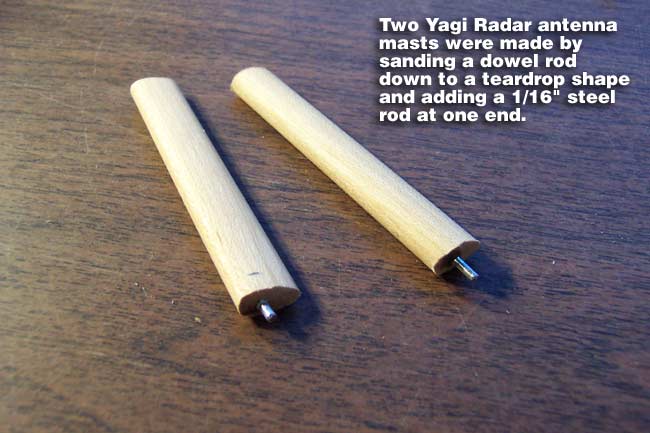
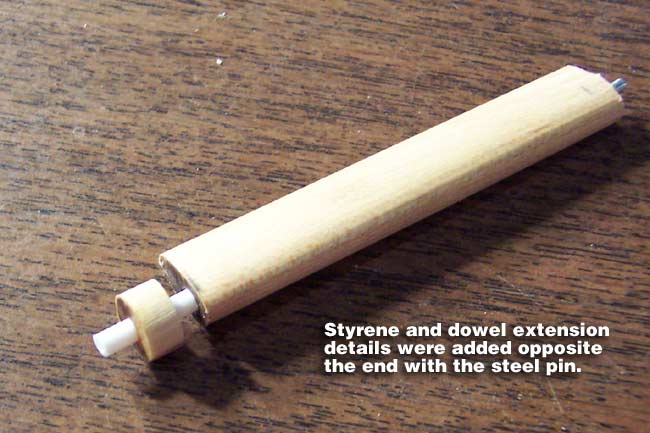
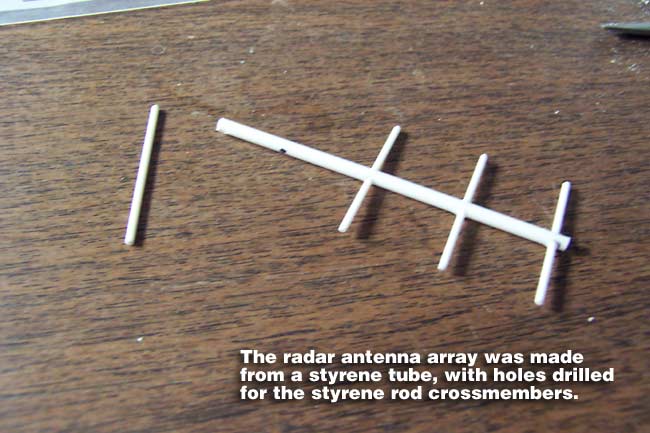
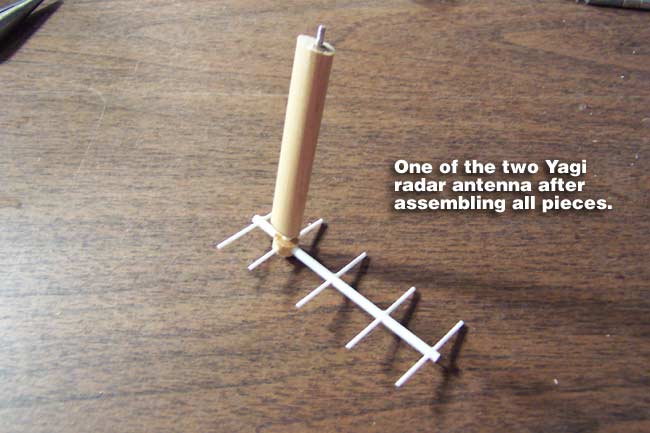
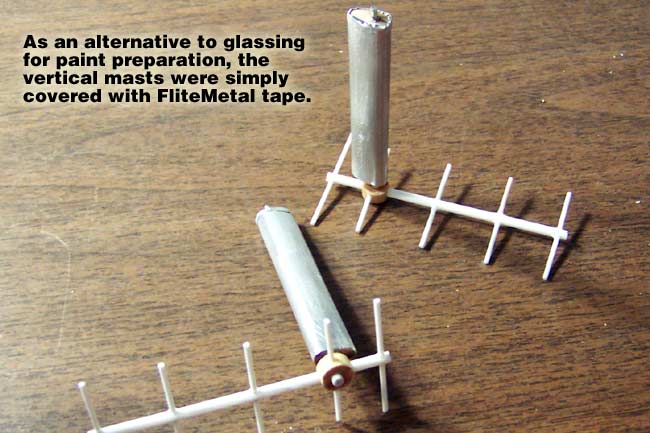
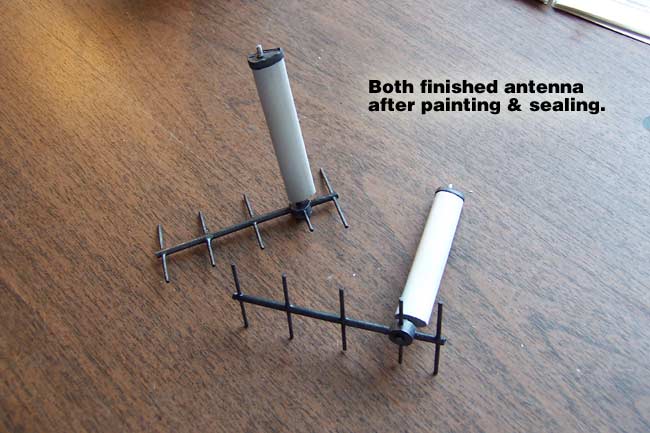
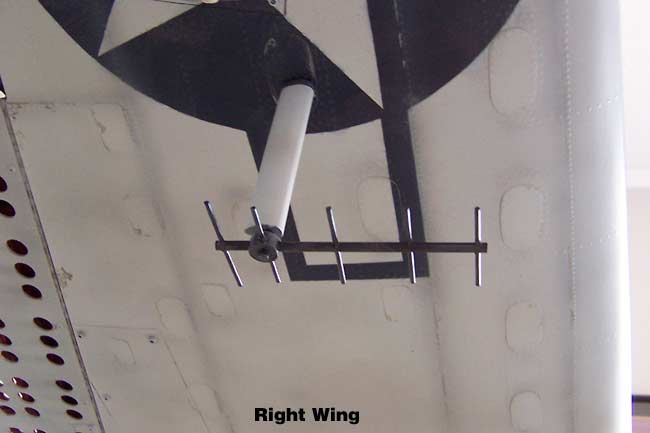
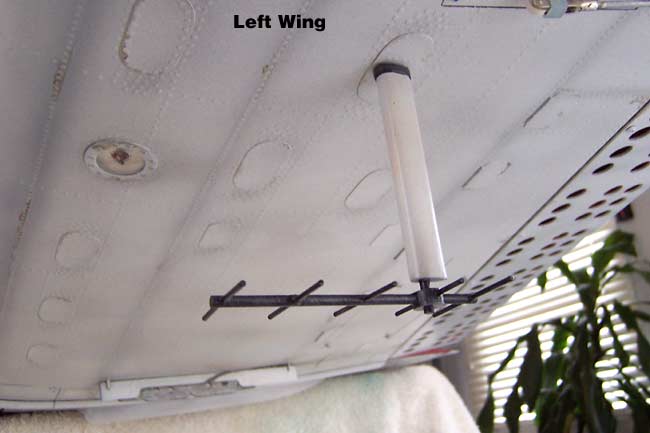
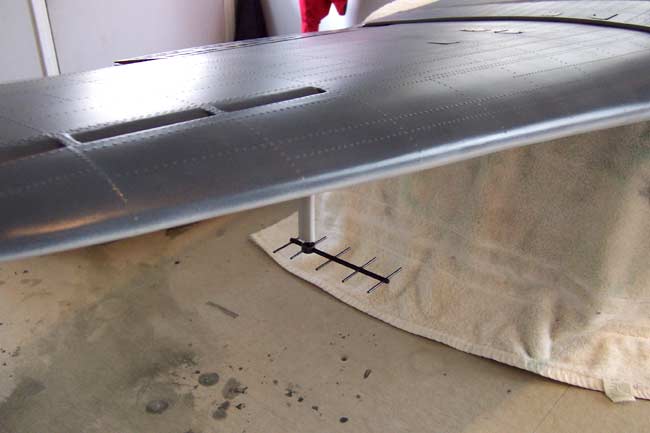
Scale Yagi Radar Antenna Most, but not all of the late SBD's had two Yagi Radar antenna installed... one under each wing. To make these antenna, I started with a large wooden dowel rod, which I sanded to a teardrop shape and cut into two pieces. I added a short steel pin at one end of each mast, which was made from a 1/16" pushrod. Next I added a styrene and dowel rod extension at the bottom of the masts, which serves as the scale antenna array center section. The actual array was made from a styrene tube, with holes drilled in it for the five crossmembers, which were made from styrene rod. Once this was all assembled, I needed to surface the wooden dowel for painting. Normally this would be glassed, lacquered, or resin applied. As a simpler and faster alternative, I simply covered the masts with FliteMetal tape. Next both antenna were painted, weathered and sealed with a clear coat.
The whole idea behind the steel pin at one end of each removable antenna was arrived at back when I was building the wing. I had embedded a hardwood block in each wing, below the sheeting. This block was drilled to receive the 1/16" steel pushrod pins in the Yagi antenna. I had self-threaded the pushrods into the blocks at that time, but now the threads are stripping out. The pushrods still fit snug, and work well as a "snap-on" static display item... but not for flight. When I get more time, I will redrill the blocks in the wings and add a nylon insert. Then I should be able to get the pushrod pins to thread into the nylon inserts, even if I have to replace them with a larger size. This should make them secure enough to stay on in flight, if I should ever need to put them on for competion. They won't be used in normal day to day flight though. Below are pictures of both of the finished Yagi Radar antenna after installation.
|