Building the Ailerons, Flaps & Brakes
 |
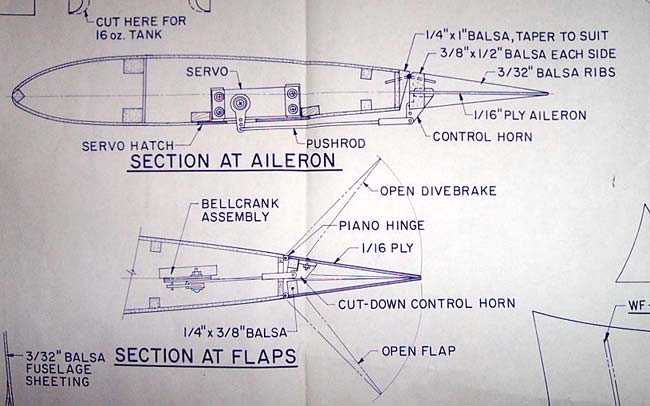
Here's a shot of the Bates plans for the control surfaces and how they get hooked up to the servos... Let's see how close I stick to this, I've already planned some modifications. Basically, the ailerons use conventional external servo arms running pushrods to external aileron horns. The horns are however mounted to the ply core instead of the surface of the aileron, since it is fabric covered.
The flaps and dive brakes have horns mounted to the inside of the ply surfaces, so that the entire linkage stays hidden inside the split flap/brake setup... no external linkage.
|
Flaps & Dive Brakes

|
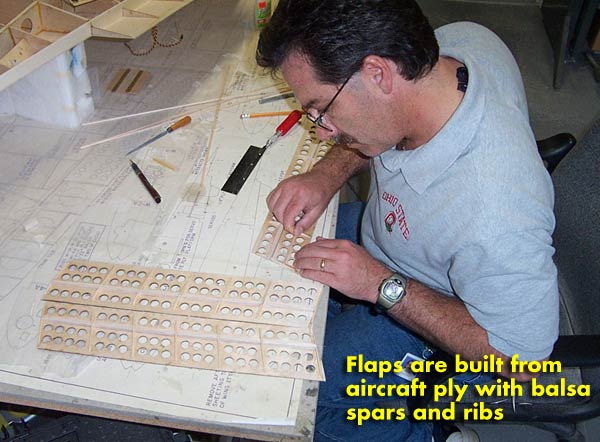
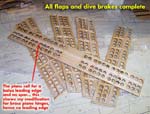
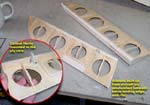
The plans have you build the aircraft ply flaps (3) and dive brakes (2) with a thick balsa leading edge. They then have you assemble a psuedo piano hinge out of short pieces of plastic tubing with a steel hing pin, and glue the tubes to the trailing edge and flaps.
Not me... I just bought metal piano hinges from Nelson Hobby and plan to epoxy them on. I also built the trailing edges from light ply instead of balsa to strengthen the union with the piano hinges.
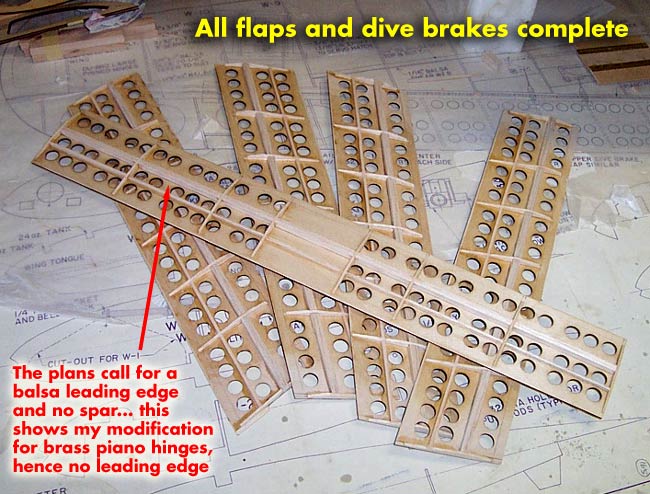
Also, with the metal piano hinges extending out onto the edge of the flaps & brakes, I couldn't use the balsa leading edge/spar on them. So, I opt'ed to go with the same approach as the full-scale SBD and build 2 spars and no leading edge. I also changed the shape of the ribs to cooperate with this mod and look more like the full-scale ribs.
I haven't yet added the control horns, and I plan to surface the flaps with resin and maybe glass the top sides.
|
Ailerons
 |
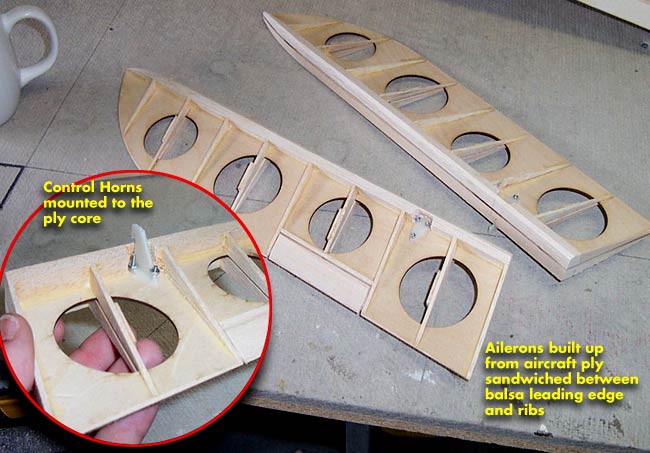
 The ailerons are built up just like the elevator and rudder. You start with an aircraft ply core, add thick balsa leading edge and some balsa ribs. The ailerons are built up just like the elevator and rudder. You start with an aircraft ply core, add thick balsa leading edge and some balsa ribs.
All this will eventually get fabric covering. The ailerons are designed/built with a flat leading edge and you back-bevel the trailing edge of the wing to allow for deflection (hinged at the top instead of center).
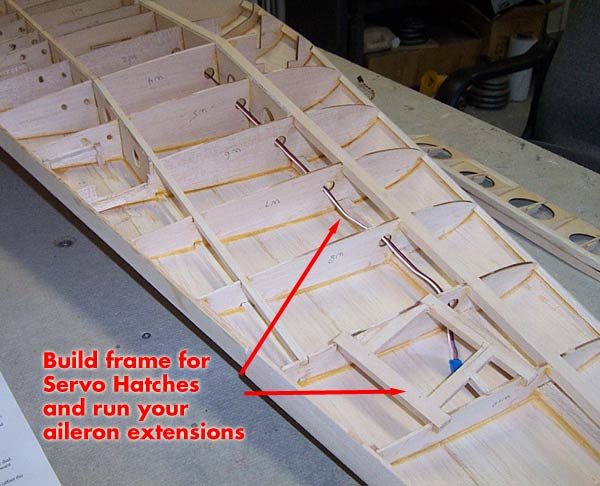
I then built the support frame for the aileron hatches, which the ailerons get mounted to. I'll throw up some pics of the hatches when I mount the servos.
|
To Bellcrank or not to Bellcrank?
 |
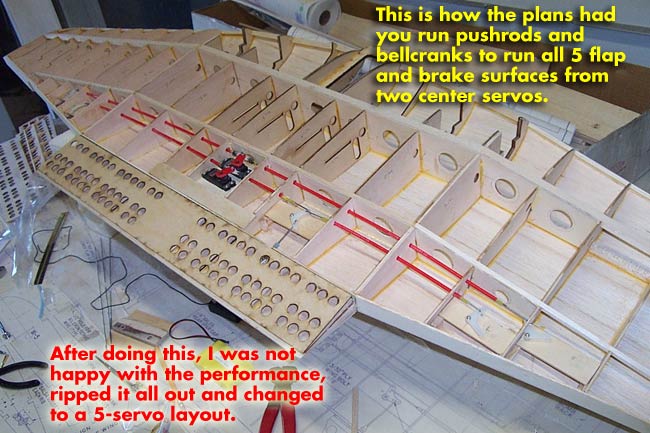
Now this is a sore subject. I busted my head, knuckles and mental stability trying to install this crazy bellcrank setup for the flaps and dive brakes. Basically, they have you run all 5 of these surfaces from 2 central servos. This means you have to get 10 pushrods, 5 bellcranks and about 18 different linkage connections to work perfectly in harmony as far as throw and trim are concerned.
This was somewhat of an exercise in futility, but, I actually did it. I tested the center flap with my Futaba 9C and everything "appeared" to work properly. However, once completed, I found that the design was flawed in the sense that it loads the bellcranks at an angle whereby they have no strength to the control surfaces. In other words, they're fine as they push and pull laterally across the wing to each other and to the servos, but where they turn 90 degrees out to the flaps/brakes, they flex up and down under pressure.
This meant I could easily compress fully deployed flaps with my fingertips... the nylon bellcranks just bent under the pressure. So, after all this work was done, I ripped it all out, cut out the platforms and started designing my own 5-servo system to control each surface with their own servo. I just could not see risking this project on a flap and brake design that I did not have confidence in. The servos are on order... stay tuned.
|

"Installing the Retracts"
|