|
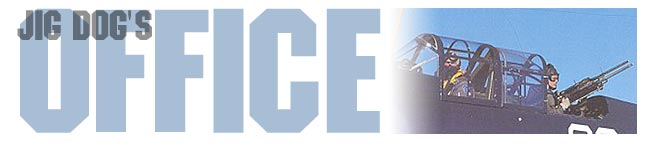
 Bringing the Crew to Life Bringing the Crew to Life
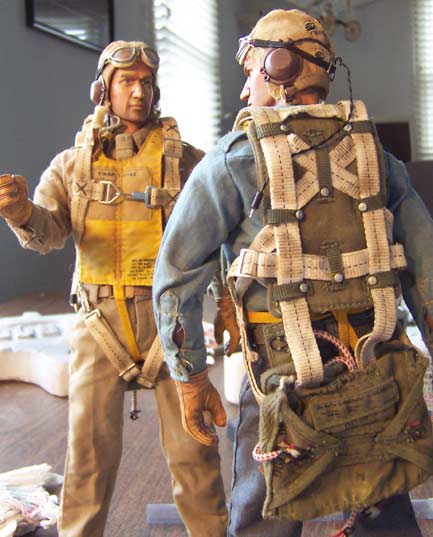
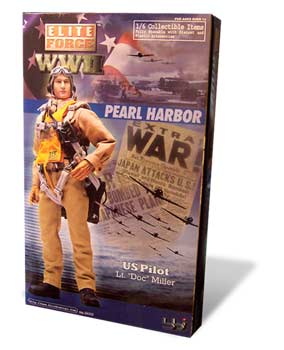
The crew I chose to man my SBD starts with the Elite Force 1/6 scale action figure "Doc Miller." This figure is a WWII US Navy pilot and was perfect to play the role of "Jig Dog" and gunner Cawley. I bought two of these figures and proceeded to enhance them to make them more realistic/lifelike and differentiate the two from one another.
 The figure comes complete with an extensive amount of details and equipment, including parachute harness, life vest, pistols, knives, watches, goggles, sunglasses and much more. I equipped mine with the primary flight gear but didn't use "everything" to help minimize weight. The figure comes complete with an extensive amount of details and equipment, including parachute harness, life vest, pistols, knives, watches, goggles, sunglasses and much more. I equipped mine with the primary flight gear but didn't use "everything" to help minimize weight.
While I personally believe the Elite Force action figures to be the best full-body figures available on the market today, there still is some room for improvement that can easily be done with the following steps.
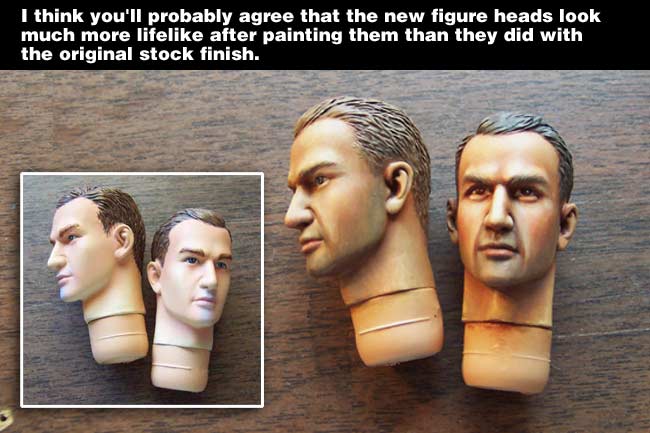
First of all, they're a little "anemic" looking for someone that spends every day outside in the South Pacific, so a tan was in order. Also, the face model is pretty good, but needs better painting techniques to bring out the features and "weather" them a little.
Speaking of weathering, the entire uniform and all gear is just too "pristine" and showroom clean. So some fading and dirtying would need to be done. The uniforms get washed regularly, so I didn't overdo it on them, but things like parachute harnesses, life vests, etc. get pretty grungy after a while and don't get sent to the laundry. The boots and gloves also needed some enhancement to tone down the color saturation, bring out detail and distress them a little from use.
Lastly, these figures are too heavy for flight at about 8 ounces each, so they'll need to go on a diet later to get them down to flying weight. However, for now, I just need to get them looking alive and in action... the diet will come later on another page.
 As for materials/tools used to bring the crew to life, the following techniques were pretty much all done using Grumbacher oil paints. They provide the most lifelike colors and will blend like no other paint on the planet! They're very easy to use, and take a tiny fraction of the amount of paint that would be required using acrylics or enamels. As for materials/tools used to bring the crew to life, the following techniques were pretty much all done using Grumbacher oil paints. They provide the most lifelike colors and will blend like no other paint on the planet! They're very easy to use, and take a tiny fraction of the amount of paint that would be required using acrylics or enamels.
The only downside of oils is dry time. They get "relatively" dry over night, but are still soft and fragile until they cure. Curing time can vary dramatically depending on how much paint you lay down... anywhere from a two or three days to a few weeks. Once completely dried and cured, they need to be sealed and protected with a clear coat, which also allows you to apply a flat, satin or gloss finish, depending on the material you are simulating.
Repainting the heads
The technique I used to repaint the two heads is basically the same technique I used on 1/35 to 1/9 scale figures in my old IPMS plastic scale, figure and diorama competition days. However, I've never seen anyone explain this technique better than the guys at Aces of Iron.
They have some fantastic figures that are extremely detailed and lifelike, but only busts. If you want full body figures, you'll have to look elsewhere or come up with a lower body for their figures. In any case, they have an awesome online tutorial for painting their figures and I won't even try to match the great job they did at explaining it. The photos at right show the basic steps I took to repaint the heads, but I strongly suggest visiting the Aces of Iron web site and read through their tutorial.
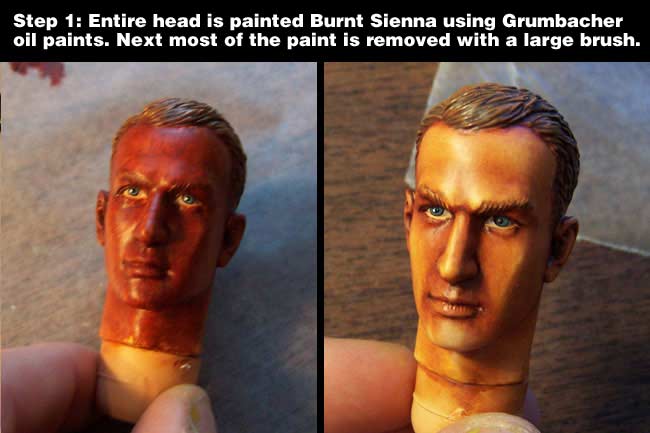
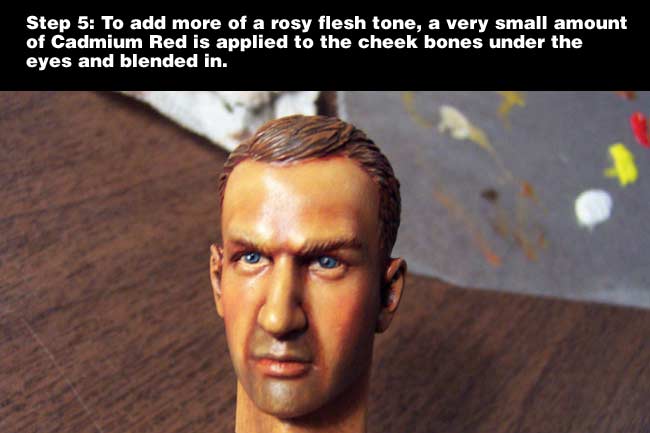
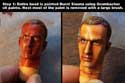
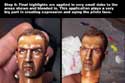
The long and short of this process is the following... First you paint the entire head with Burnt Sienna then brush it back of with a larger brush. This starts the "tanning" process to get the flesh tones started in the right direction, and leaves the darker color down in the creases and shadow areas. It also provides a wet base for you to begin blending the following colors into.
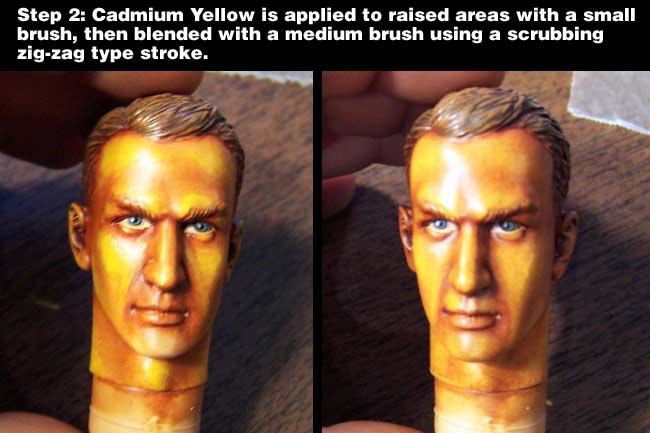
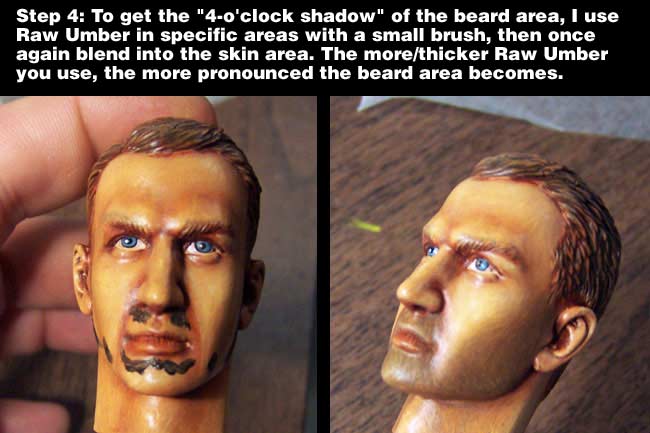
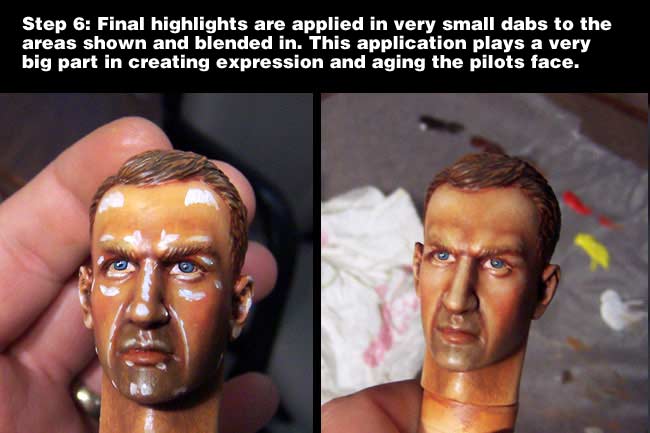
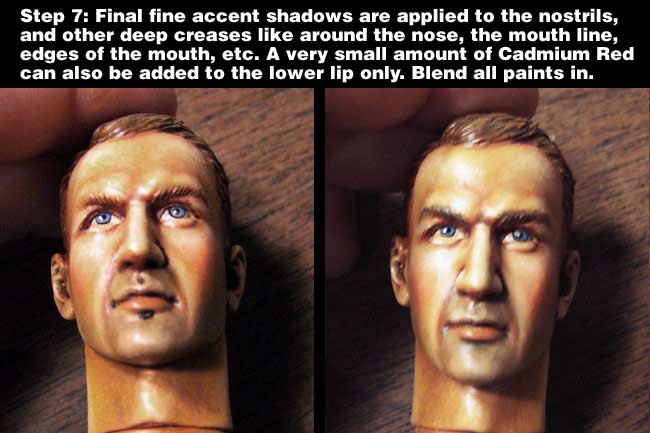
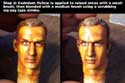
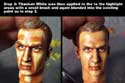
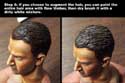
The next few steps are various shades of Titanium White, Cadmium Yellow, Cadmium Red and Raw Umber applied with a small brush then blended into the skin with a medium brush. This process darkens your shadow areas, lightens your highlights, adds "some blood" below the skin and even throws that "5-o'clock shadow" onto the beard area.
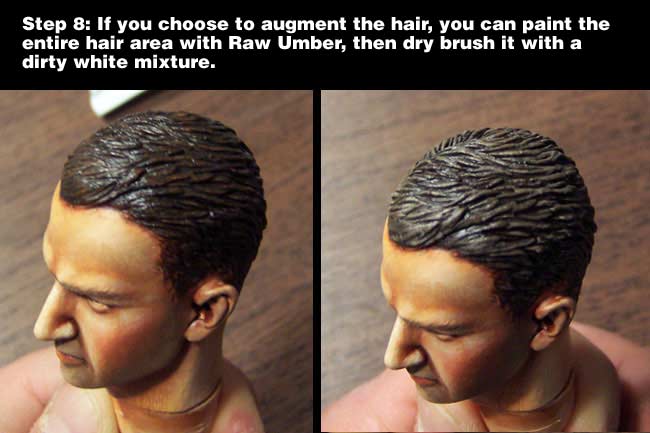
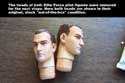
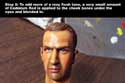
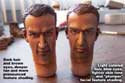
The nice thing about the Elite Force pilot heads here is that you can skip the hardest step... the eyes. They are already painted just fine and don't really need redone. However I did repaint the eyes of one of the heads so that one had blue eyes and the other brown. I also gave one dark hair and the other light hair.
I also varied their skin tone and beard pattern between the two. Lastly I gave one slightly "plumper" features by applying less enhancement to facial lines and wrinkles. This is very hard to see in the photos but shows up pretty well in person.
|
 |
 |
 |
 |
 |
 |
 |
 |
|
|
|
|
Enhancing & Weathering the Gear
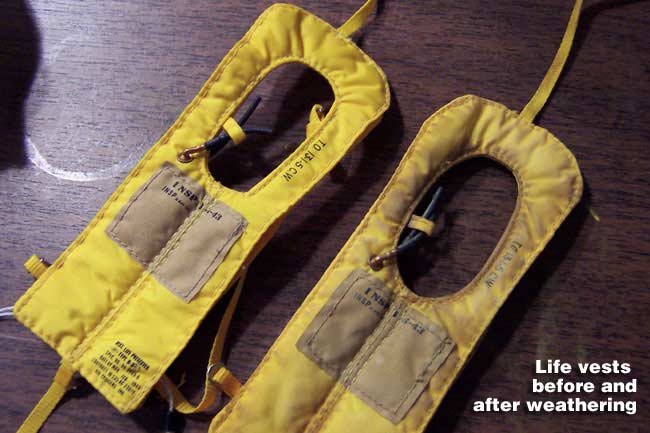
To enhance and weather the various gear, I also used the oil paints, but very lightly. First I mixed a dirty shade of whatever I was painting, for example a darker/dirtier yellow for the life vests.
This was applied with a scrubbing motion to the areas that would be soiled and stained, especially around the neckline. The key here is to have virtually no paint in your medium brush. A very dry brush with very little paint can be scrubbed on the surface to gradually build up the desired amount of weathering. Next, I use a dry-brush technique across the high areas of relief to bring out the folds and simulate a little color fading in some areas.
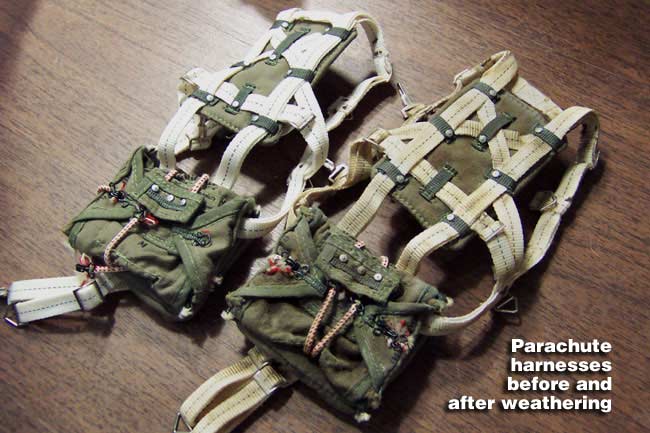
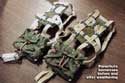
The parachute harnesses were done basically the same way, but the main focus here was to tone down the glowing white of the harness straps and add some staining around the neckline.
|

 |
|
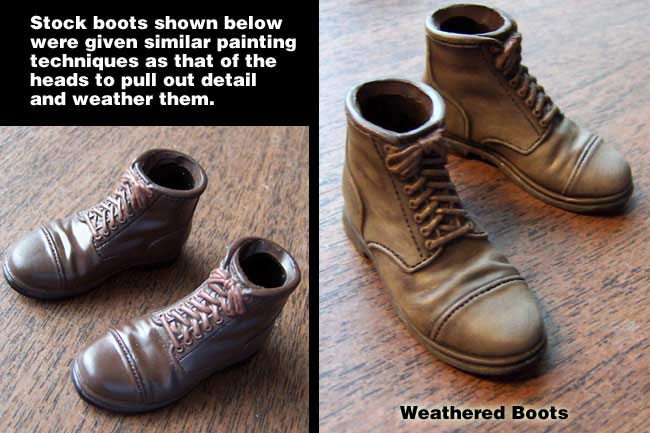
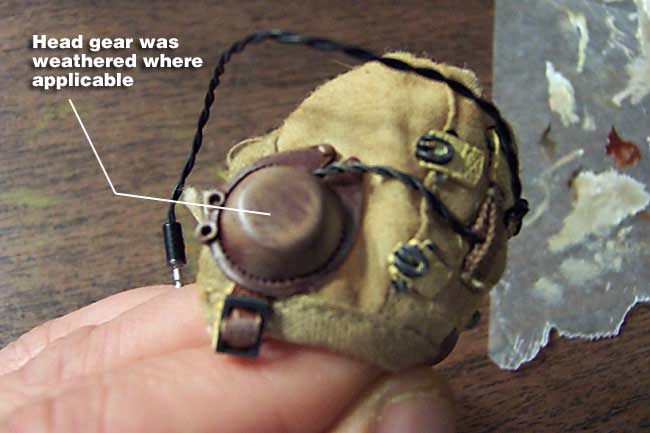
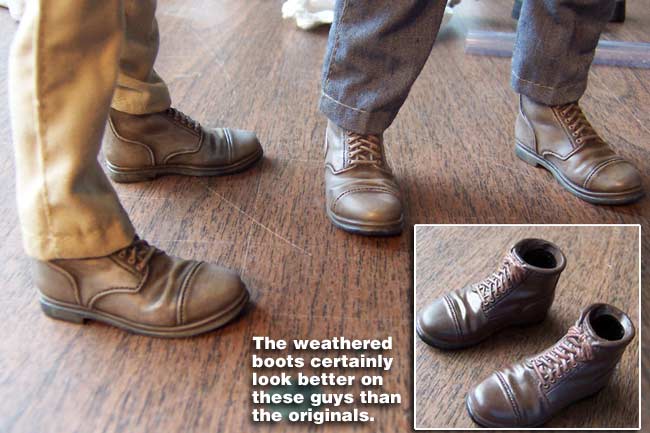
The boots, gloves and head gear got similar treatment to that of the life vest and parachute. Raw Umber was worked down into creases and deep relief, while lighter shades were applied to the higher relief areas. Some light colors were also dry brushed to simulate distressing and fading of the materials.
|
The Uniforms/Clothing
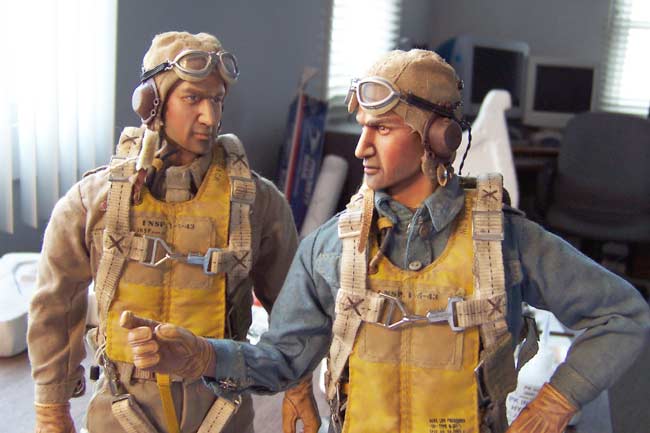
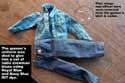
Being officers, the pilots of the SBD wore khaki uniforms in the South Pacific, while the radio/gunner crewman did not. These enlisted men wore Navy blues, which consisted of dark Navy Blue pants and lighter blue shirts.
I tried many bleaches to get the khaki uniform white, but nothing affected them. The bleach of today is not the bleach of my childhood. They have toned it down so much to make it "color-safe" that it no longer will bleach fabric white. So, I tried RIT color remover, which did a fair job on the shirt, but didn't affect the pants. However, using RIT dye, I was then able to dye the shirt Royal Blue and the pants Navy Blue to get a pretty decent set of Navy crewman blues. I also removed the officer's bars and pilot's wings from the blue shirt.
Lastly, both uniforms were very lightly weathered by lightening the elbows and knees to simulate color fade, then a little light soiling was applied. Be very careful not to overdo this step, as the uniforms weren't nearly as dirty/weathered as the flight gear.
|
 |
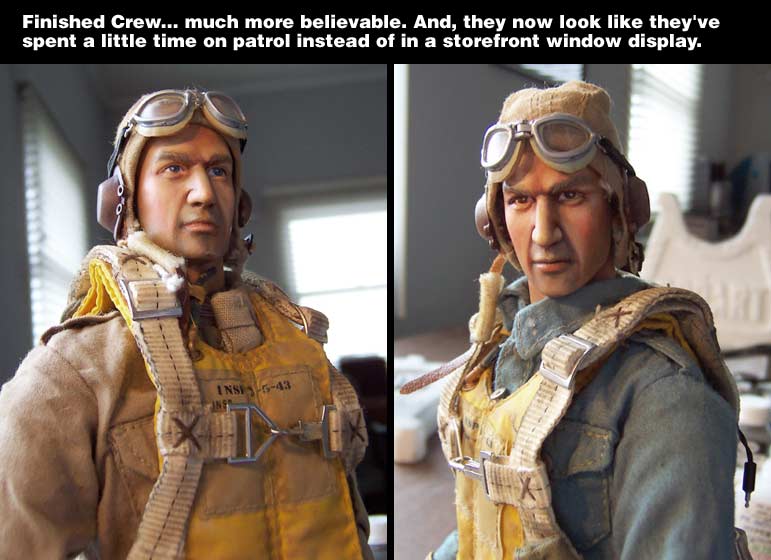
Crew has been brought to life!!
Well that's pretty much it for adding some life and realism to the crew. I do still have to put them on a diet, hopefully cutting their respective weights from 8 ounces down to 3.5-4 ounces each. That will happen later on, but before I ever attempt to have them on board the SBD for actual flight.
Overall, I'm quite happy with the way they look now. They look much more "alive" and certainly look more weathered and like they've seen some active duty. Again, a lot of the subtle effects are not really coming through in the photographs, but you'd notice a lot more improvement over the stock figures if you saw them "in the flesh."
|