|
|
 |
|
|
|
|
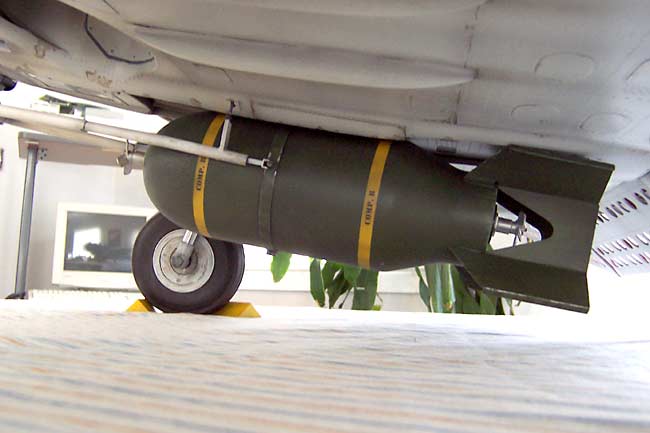
Making a 1000lb Bomb for Static Display The SBD carried a variety of ordinance from 100 pound bombs all the way up to 1600 pounders. However the most commonly used item was the standard 1000 pound bomb mounted on the center rack. This bomb came not ony in the standard variety but also an armor piercing version. I am making at least two bombs for my model, one will be a fully detailed 1000 lb bomb for static display & competition. The second will be a more durable and less detailed version for actual in-flight bomb drops. This page will cover the static version, later I'll cover the droppable bomb and dropping mechanism.
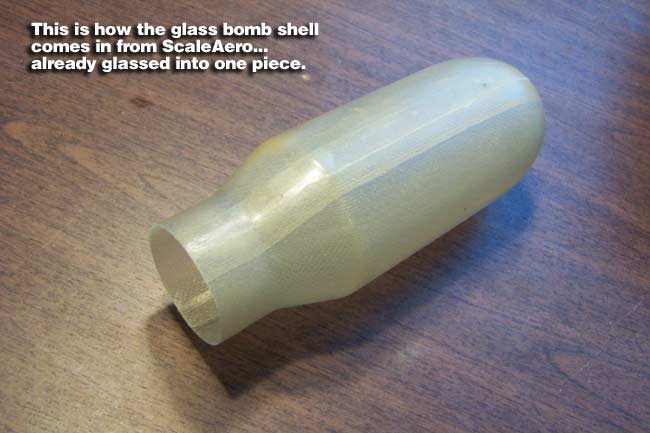
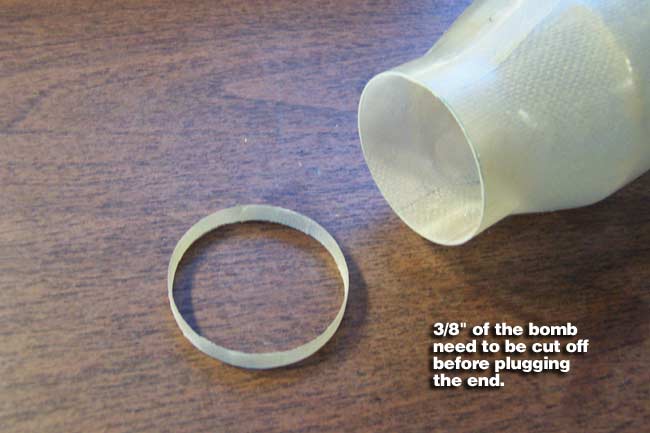
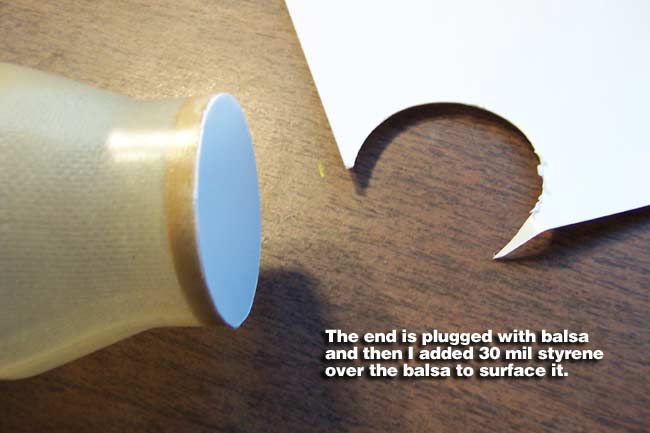
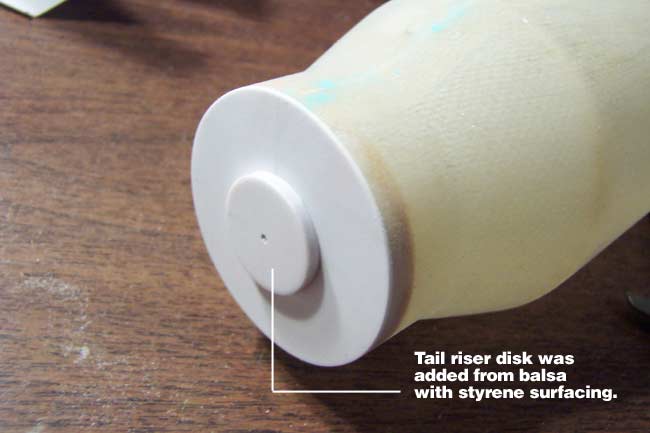
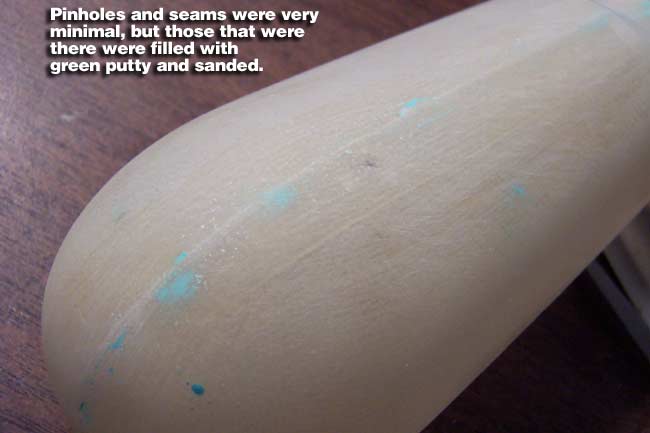
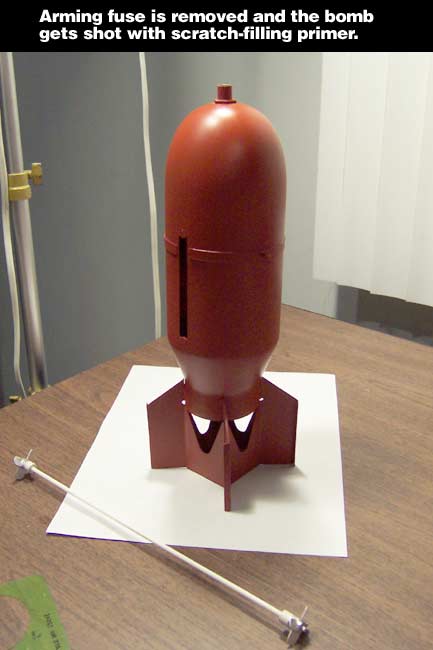
I started out with the fiberglass bomb shell for the Jerry Bates SBD, which I got from ScaleAero/BuyAero. The pic at left shows how it comes in, which as you can see, is with the two halves of the bombshell already glassed together into one piece. The scale accuracy and quality of the glassing of this bomb is top notch... very impressive with very little work. The first step was to cut off 3/8" from the tail end of the bomb per the instructions and plans to get it to the proper scale length. Balsa is used to plug the open end, which I then surfaced with 30mil styrene. A balsa disc was then added to the tail end and surfaced with styrene to form the additional scale riser for the tail fuse. The pinholes, seams and flaws in the glass surface were very minimal, but the small amount that was there was puttied and sanded smooth.
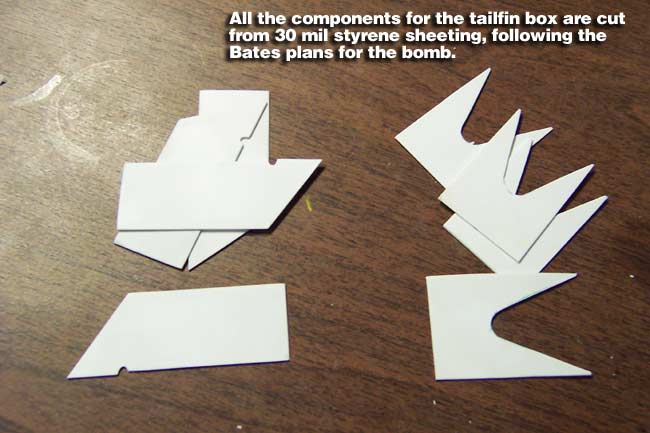
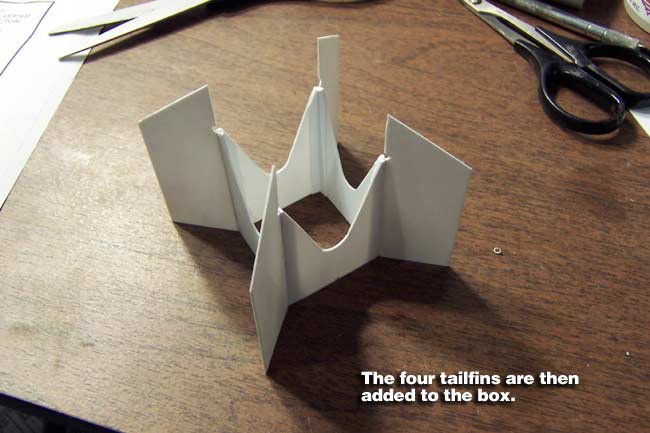
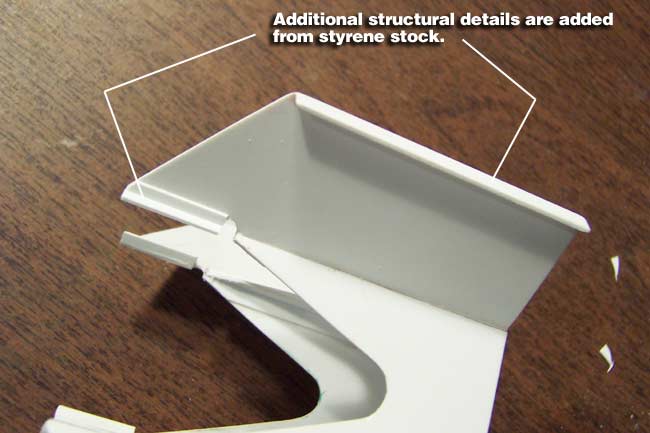
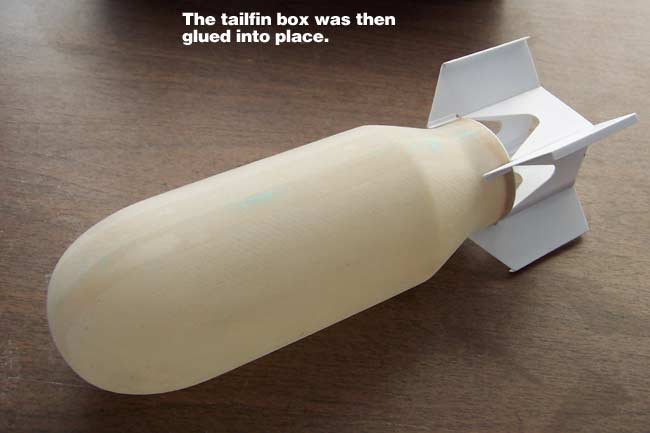
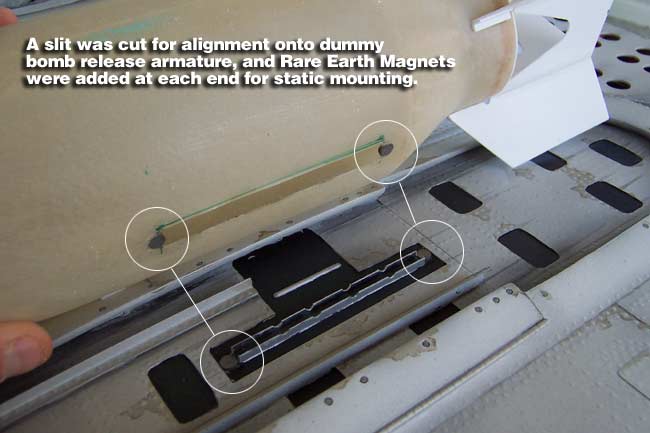
The Tailfin Box The bomb does not come with the parts for the tailfin box or scale details, but they are all pretty well drawn up for you in the Bates plans for the SBD. Following the plans, I built the tailfin box using 30mil styrene instead of the suggested 1/32" aircraft ply. This gives me a smooth surface without additional glassing/surfacing to paint. Additional structural supports and details were added from styrene sheeting and L-channel. To make the static bomb easily mountable and removable without having to use the radio/servo for the droppable bomb, I came up with a simple mount scenario. I cut wide slit in the top of the bomb that fits over the "dummy bomb rack" on the belly of the plane and added Rare Earth magnets at both ends. Magnets were added at both ends of the dummy rack to, so the bomb easily pops on and off of the dummy rack with the magnets holding it in place.
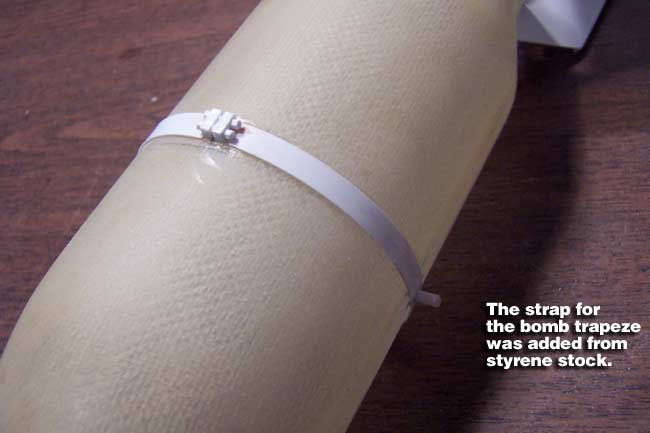
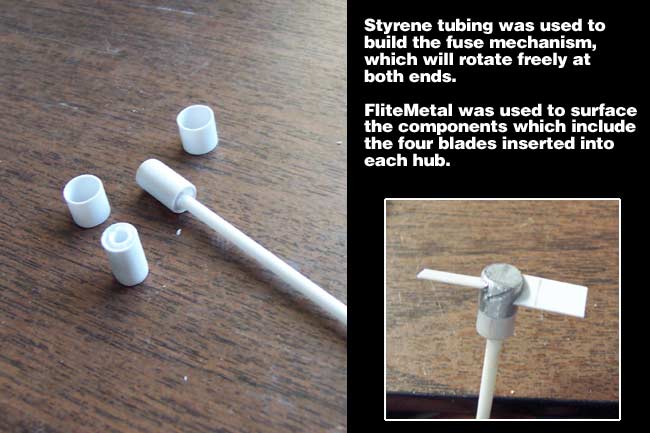
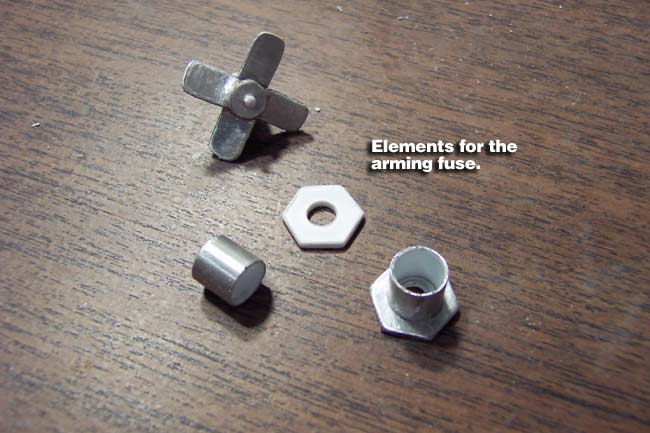
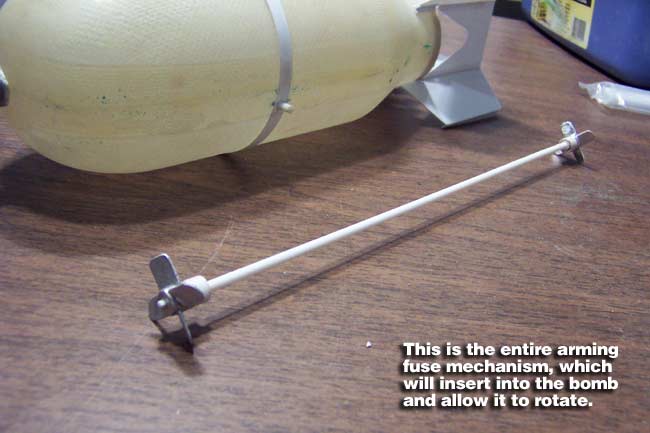
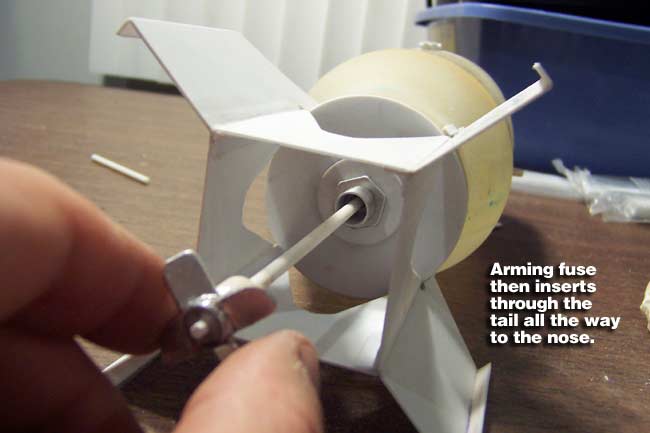
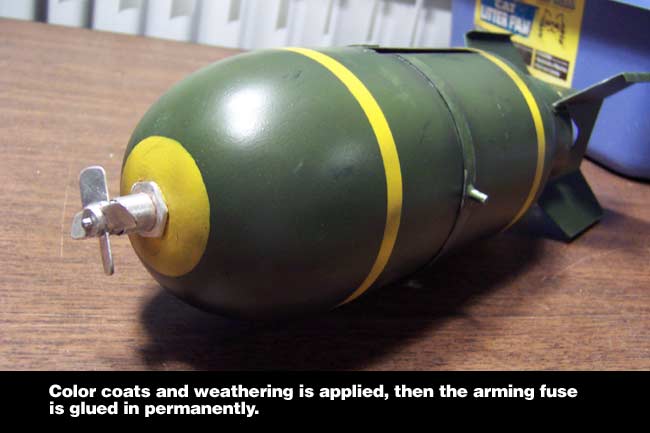
Additional Details The metal strap that goes around the bomb for the trapeze to mount to was fabricated from styrene stock and detailed appropriately. The bomb has an arming fuse that consists of a four-bladed spinner at both ends of the bomb, which will arm the bomb fuse when they spin up after dropping. I wanted mine to actually rotate, so below I show how I fabricated this assembly. Basically it's all made from styrene stock and surfaced with FliteMetal. The two spinners are connected to each other by a styrene tube that runs through the center of the bomb, from end to end. The spinner blades can be rotated at either end, but don't really "spin" like a prop since they don't have ball bearings, which would be even more anal. This is good enough for display.
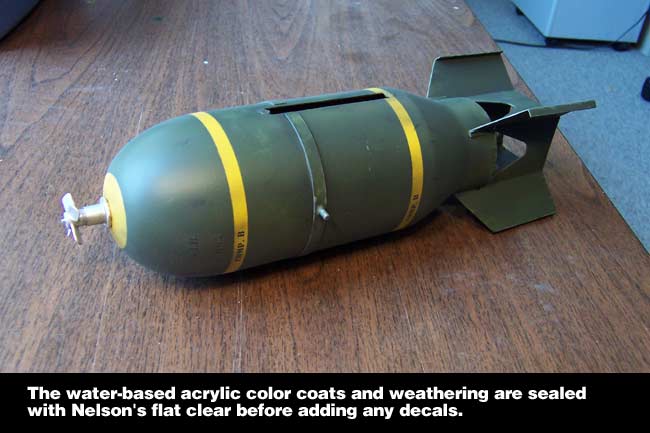
Paint, Weathering & Decals The entire bomb was painted and weathered with Model Masters water-based acrylic hobby paints. After this was done, I sealed it all in with a couple coats of Nelson's Flat Clear and let it dry over night. The next day I came in and added all the appropriate markings with water-slide decals from Hans at Heavy Date Hobbies. When the decals dried, I gave it a couple more coats of Nelson's flat clear, and a coat of Model Masters Acrylic Flat Clear.
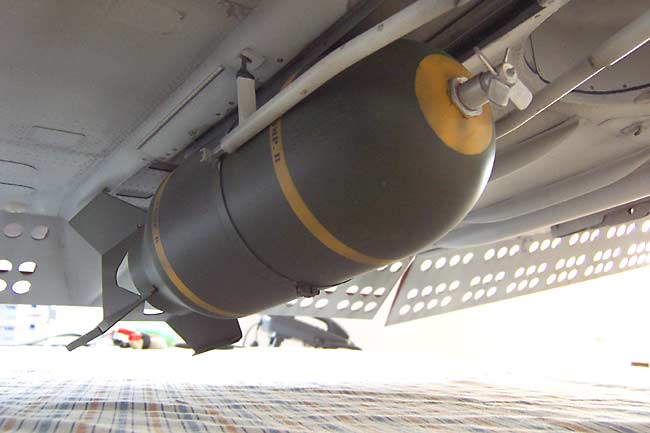
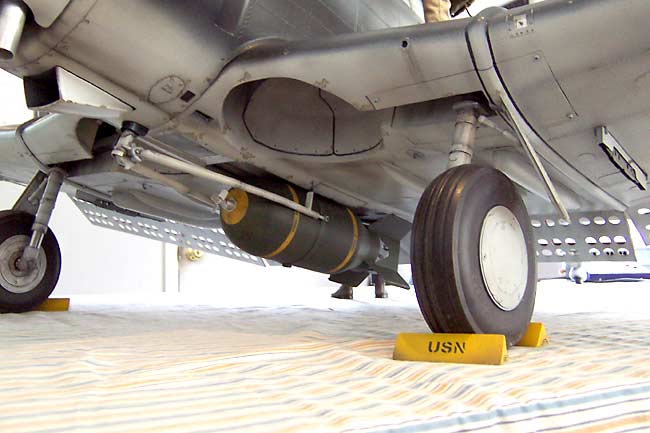
Finished and Mounted Once the paint was dried, the bomb easily mounts onto the dummy rack and magnets for static display. The grips at the end of the bomb trapeze also snap right onto the scale rods/pins that stick out of the strap around the bomb. Everything fits very snug and aligns perfectly.
When I make the droppable version of this bomb, it will get a different "functional" mount, which will act independently of the static mount and they won't interfere with one another. Here are some pics of the finished static bomb after mounting. This pretty much finishes the entire plane now, with the exception of the droppable bomb, which I'll go back and do after it has made it's first few flights.
|