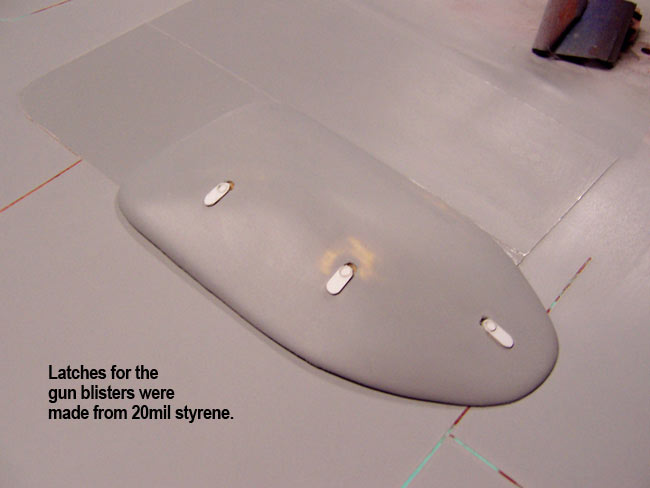
Dec 7 , 2006


Inboard Gun Blisters

The large tell-tale inboard gun blisters of the FW190 were next on the list for detailing the wing. I begin by making the large access panels that the blister resided within, these panels were hinged access panels, so I chose to make them with FliteMetal to help highlight the difference between them and surrounding panels.

I first cut out some FliteMetal stock, scuff-sanded it and cut it to shape. I think the sanding helps the primer I use to get a better bite into the FliteMetal, but it may not be necessary. I've just always had good luck with this technique. Once the FliteMetal was cut to shape and size, I began burnishing it down (two panels on each wing half) using a paper burnishing stump I got from ScaleAero. The FliteMetal material also came from Ed at ScaleAero. With the panels in place, I masked the area of and gave the panels a few coats of Filler Primer.

Next, I began building the actual blister hatches from a piece of one inch thick balsa stock. I chewed away most of the excess using a power balsa plane which makes short work of balsa in a heartbeat. I whittled them down further using a bench sander and then finished up shaping them by hand sanding.

Once the blisters were at the accurate shape, I finish sanded them and began glassing them. Like the airframe, I glassed them with 3/4oz cloth and 6 coats of Minwax water based Polycrylic. When the Poly had cured, I sanded smooth and applied my Filler Primer.


Once the primer had adequately dried, I finish sanded the blisters and glued them in place on the wing using Medium CA.

Note in the pics at right, that I made the small hatch release tabs from 20 mil styrene sheeting. These were positioned on the blisters and surrounding panels as per the 3-views.

I also did a little detailing on the tabs using a heated brass tube. This area and all other areas of the wing will get a little more rivet detailing later after I'm finished detailing the whole airframe.


Wing Guns

Since the wing guns of the FW190 A-7 stuck so far out of the front of the wing, I decided they would need to be removable as not to break them in transport and storage. In order to keep them in place during flight, I needed to come up with a good mounting scheme that made it easy to install and remove them on a regular basis.

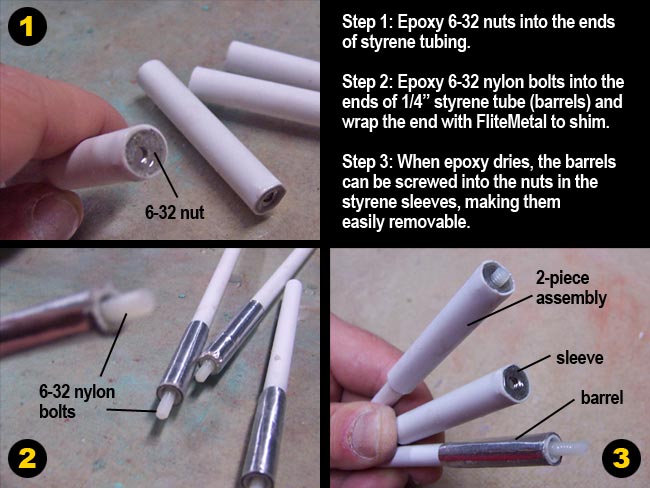
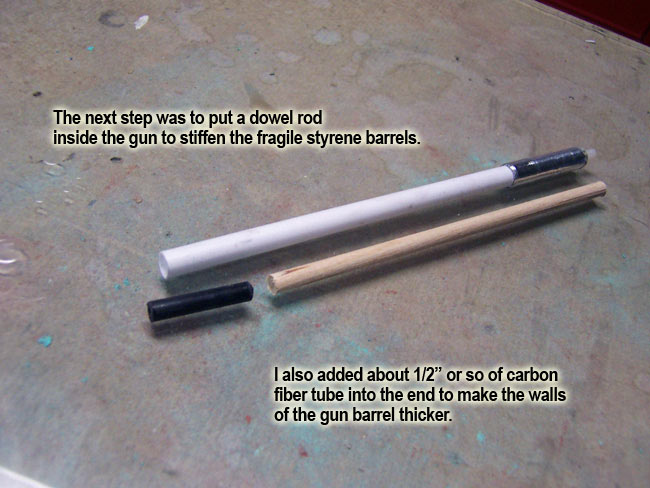
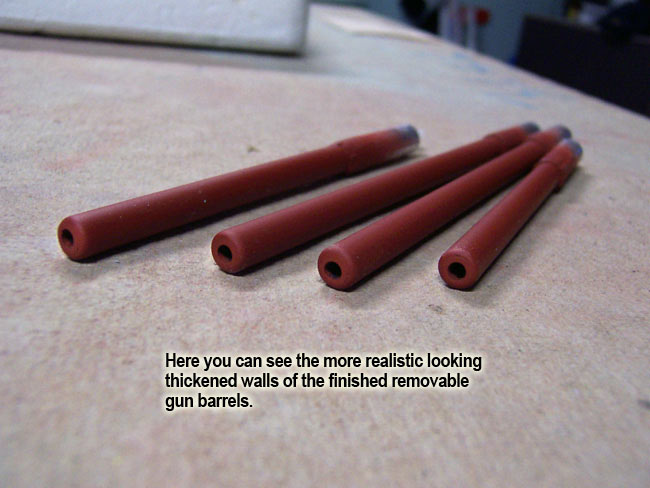
First off, I fashioned some barrel sleeves for the wing from 3/8" styrene tubing. I then cut the actual gun barrels from 1/4" styrene tubing. Everything gets cut a little long so I can trim as needed throughout the fabrication and installation.

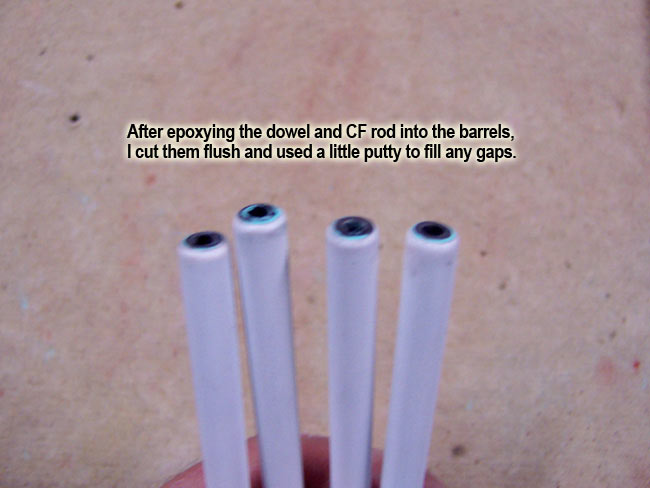
To make the two components a removable assembly, I epoxied a 6-32 nut into the base end of the 3/8" sleeves... then epoxied a 6-32 nylon bolt into the base end of the 1/4" barrels. This would allow me to screw the barrels in and out of the sleeves with not danger of RF interference if they should work loose in flight. I then shimmed the base ends of the barrels with FliteMetal so that the barrels couldn't "wobble" inside the sleeve. The FM material helps to keep the barrels aligned dead center in the sleeves, and provide a snug fit.

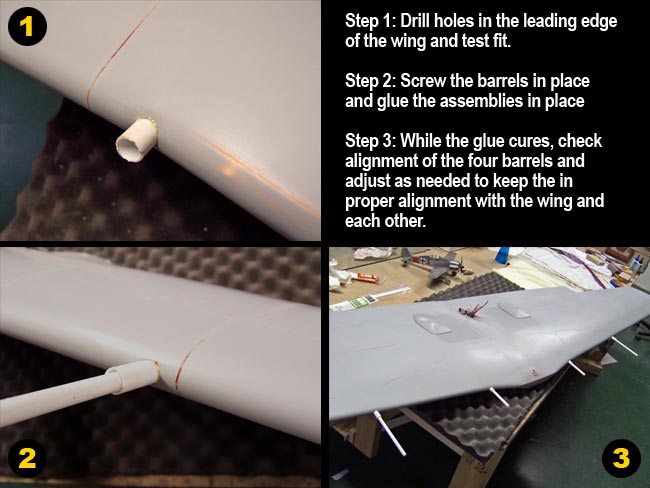
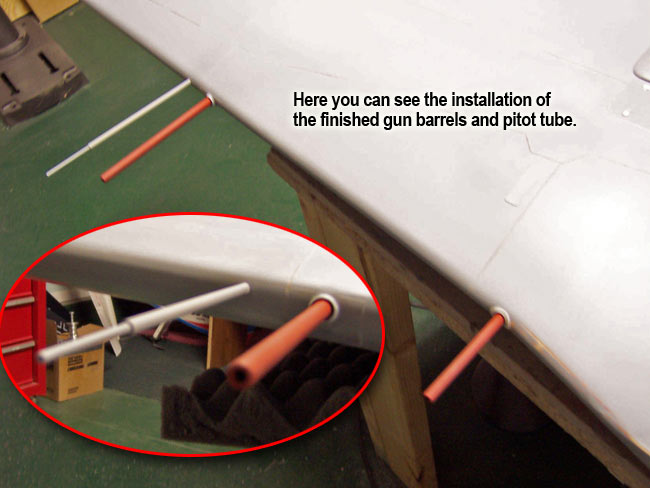
I drilled 3/8" holes in the leading edge of the wing to receive the styrene sleeves. These were inset about 1-1.5" inside the wing. I then epoxied the 4 sleeves into the holes with the barrels screwed in. This allowed me to check alignment of the barrels and adjust as needed while the epoxy was curing. Once dried, I removed the gun barrels leaving the sleeves permanently installed.

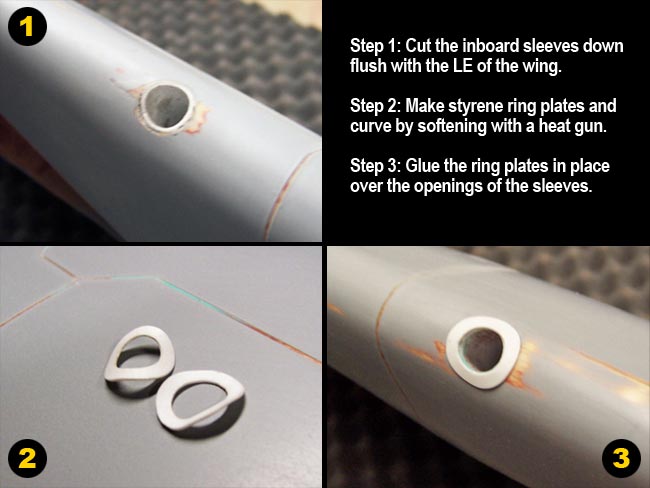
Now I cut the inboard gun sleeves flush with the LE of the wing. Then I drill two 3/8" holes in a piece of 10mil styrene sheeting, then cut them out of the sheeting making two ring plates that resemble "washers". I bend the rings to the contour of the wing leading edge by softening them with a heat gun and bending to shape. The rings were then glued over the opening of the inboard gun sleeves.

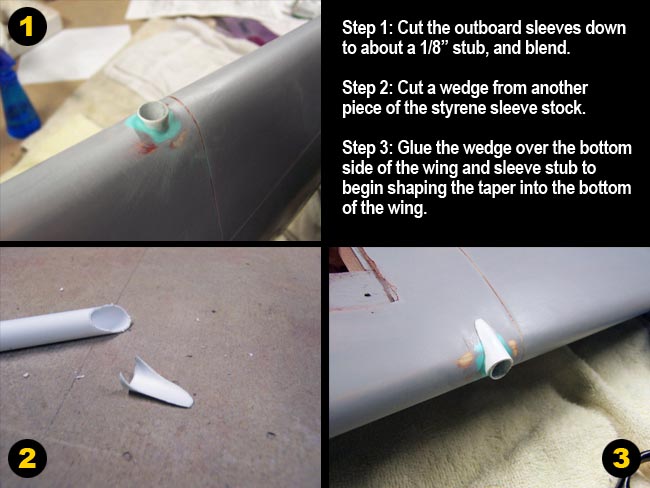
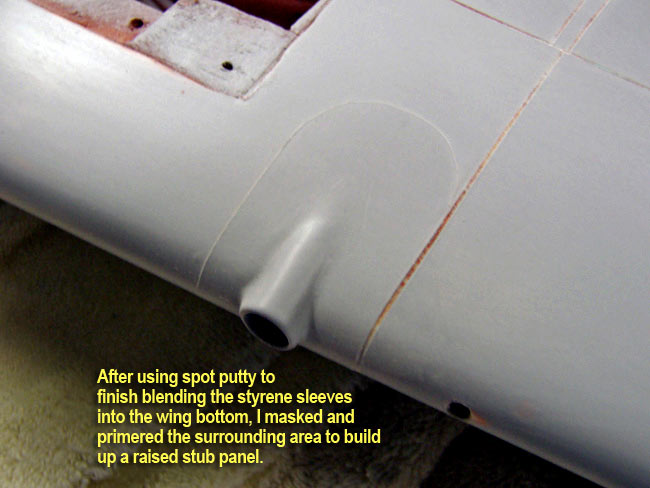
The outboard gun sleeves were cut down to about a 1/8" stub sticking out of the wing LE, and puttied to fill in any gaps. I then cut a "wedge" from a scrap piece of the 3/8" styrene tubing and stretched it over the bottom side of the stub and wing to begin blending the stub into the wing bottom. With a little putty work, I was able to build a convincing taper for the gun stub that closely resembled the full scale feature. Lastly, I masked off the surrounding area to "primer up" a raised gun stub panel per the 3-views.


Now, to finish up the gun barrels, I would need to stiffen them up a bit as the 1/4" styrene tubes are very light, but also kind of fragile. To do this I epoxied a thin dowel rod inside each tube. The rod butts against the nylon bolt head inside the barrel, and stops about half an inch or so from the front end of the barrels.

Next, I needed to build up the inside walls of the barrels as the styrene tubing is far too thin to be convincing as the heavy gun barrels of the FW190. To do this, I epoxied a short blank of carbon fiber tubing inside each barrel and cut it flush with the end of the barrels.

After applying a little putty to any gaps between the CF rod and styrene tube, I sanded and primered. The end result was quite realistic and made for some pretty cool looking MG 151 gun barrels that could be removed for transport and storage.


Pitot tube and hatches

The pitot tube of the 190 A-7 was a very long slender tube that positioned next to the right outboard wing gun. To make mine, I just glued a thin aluminum tube inside a slightly larger brass tube. I drilled a hole in the LE of the wing that was just large enough for a very tight fit when sliding the pitot tube in place. At this point, I don't think I'll install the pitot for flight... just for static display and photos.

Lastly I had an assortment of various access hatches that needed to be fabricated and installed on the wing. I cut them all by hand from sheet of 10mil styrene, then glued them in place with Medium CA. There weren't a whole lot of them to do on this wing of this model, but here's a pic at left that shows a few of the ones for the bottom of the wing.

That's it for wing detailing, nothing left to do here before painting except for rivets. I'll detail the retracts and gear doors separately in another article soon. Next I'll start detailing the fuselage.


"fuselage details"


| Scout Recon | Building the 190 | Paint & Detail | Cockpit | On Patrol |

back to tompierce.net - rc planes