|
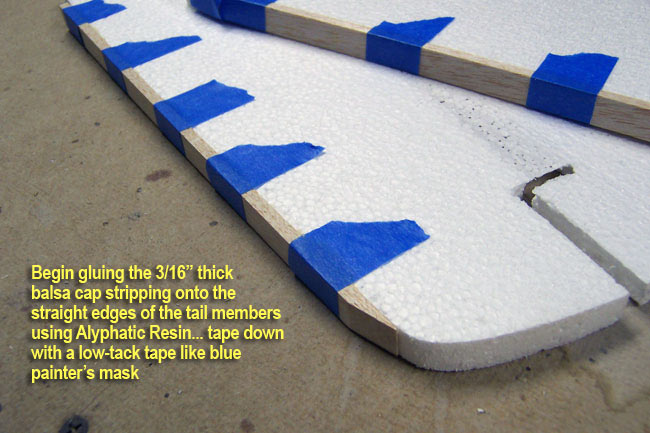
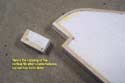
Applying the straight cap stripping
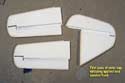
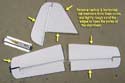 The first step you perform on the tail is to remove the tail members from the foam cores and lightly sand the outer edges of them with 100 grit sandpaper (use a long sanding block). This opens the pores of the styrofoam so that the glue saturates more effectively. Once the edges are sanded you can begin capping by applying the 3/16" balsa cap stripping to the straight edges only. Be sure to do all these steps with the control surfaces still attached to the stabs... you'll detach them later. The first step you perform on the tail is to remove the tail members from the foam cores and lightly sand the outer edges of them with 100 grit sandpaper (use a long sanding block). This opens the pores of the styrofoam so that the glue saturates more effectively. Once the edges are sanded you can begin capping by applying the 3/16" balsa cap stripping to the straight edges only. Be sure to do all these steps with the control surfaces still attached to the stabs... you'll detach them later.
 |
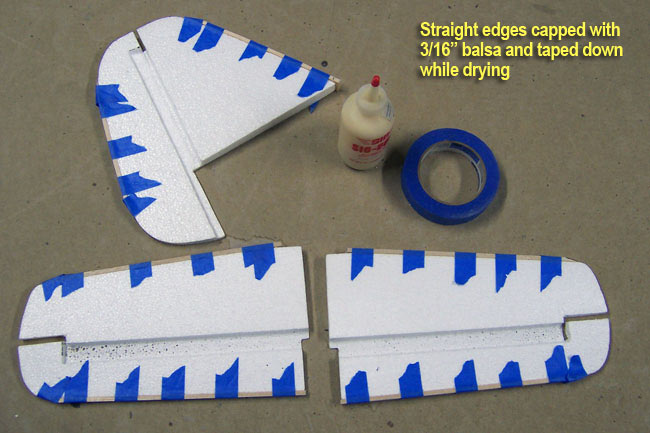
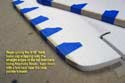
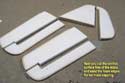
Alyphatic resin is the glue of choice for adhering the cap stripping to the edges of the tail members. Use a low-tack tape to "strap the strips to the foam tightly while gluing. All stock in these steps is the 3/16" balsa strips supplied with the kit.
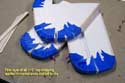
To determine the appropriate width, the rule of thumb is that the stock should be as wide (preferrably wider) than the foam edge to be covered. On the horizontal tail, I used 1/2" on the LE and 5/16" on the TE. On the vertical tail, I used 3/4" in the LE and 1/2" on the TE. Allow to dry a good while, I let mine set overnight.
Once dry, you can remove the tap and cut/sand the excess stock so that you will have flush, clean joints for the next set of strips. Note that you do not cap the short 1-1/2" straight section at the LE of the horizontal stabs where they insert into the fuse. This will be done after joining the two stabs together. |
Cap stripping the curves
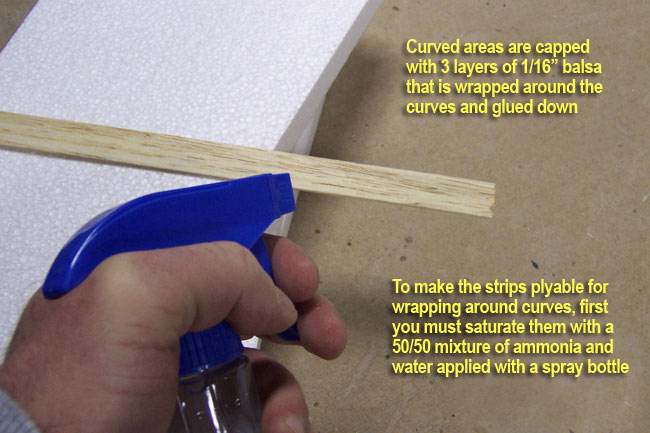
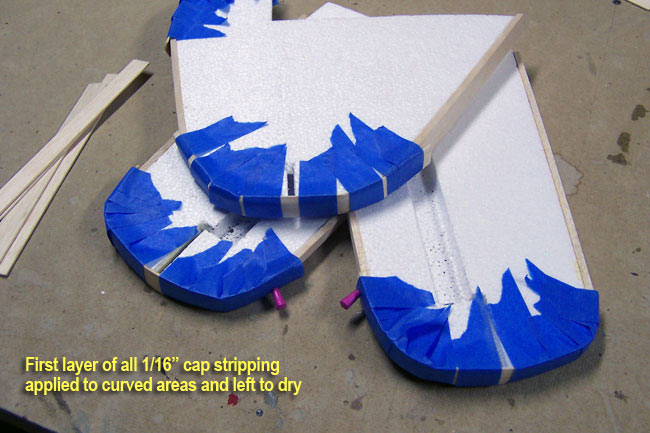
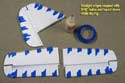
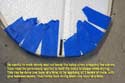
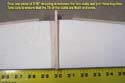
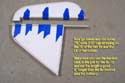
 Next, to cap strip the curved areas you will use the 1/16" balsa stripping, applying it in 3 layers to build up to the 3/16" depth of the previous strips. In order to get the 1/16" strips to bend around the curves, you'll need to saturate them with a 50/50 mixture of ammonia and water (apply with a spray bottle). Next, to cap strip the curved areas you will use the 1/16" balsa stripping, applying it in 3 layers to build up to the 3/16" depth of the previous strips. In order to get the 1/16" strips to bend around the curves, you'll need to saturate them with a 50/50 mixture of ammonia and water (apply with a spray bottle).
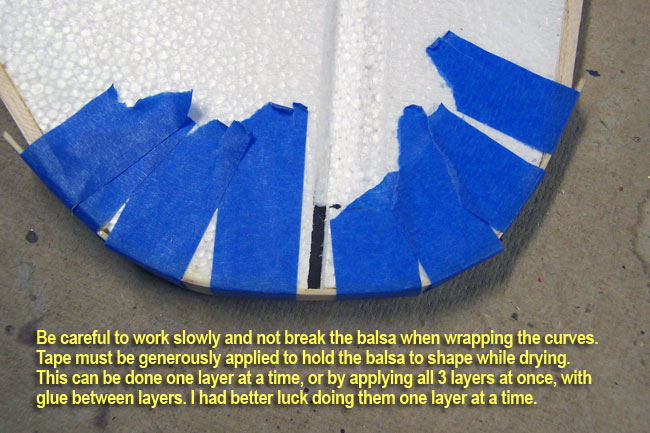
You can glue 3 strips together and apply while still wet, or apply the strips one at a time, allowing them to dry between layers. I had better luck doing them one at a time. Tape them securely and allow them to dry, being sure to snug them down to the curve contour, but not so much that you deform the shape of the foam. If you're doing them one layer at a time like I did, allow this to dry sufficiently and repeat the process with the remaining two layers of 1/16" stripping.
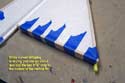
While the curve strips are drying, you can go ahead and add the 3/16" straight strips to the bottom of the vertical fin and the inner ends of the horizontal stabs (where they will but together later). Once all stripping is sufficiently dried, go ahead and remove all tape.
|
|
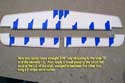
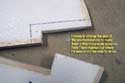
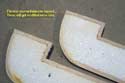
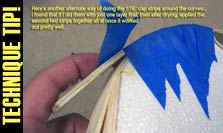 Here's a technique tip that might help you out. Afte doing the curved cap strips a little while I found that once you have your first layer of 1/16" stripping down, the foam gets reinforced a good bit. This allowed me to wet and glue the remaining two layers together and apply them both at once around the curves without deforming the foam when I pulled the tape down tight around the curves. You may have better luck than I did applying all 3 layers at once, but I found that in order to pull them all down snug around the corners it just took to much pressure and was bending the foam. This technique solved that problem. Here's a technique tip that might help you out. Afte doing the curved cap strips a little while I found that once you have your first layer of 1/16" stripping down, the foam gets reinforced a good bit. This allowed me to wet and glue the remaining two layers together and apply them both at once around the curves without deforming the foam when I pulled the tape down tight around the curves. You may have better luck than I did applying all 3 layers at once, but I found that in order to pull them all down snug around the corners it just took to much pressure and was bending the foam. This technique solved that problem. |
|

|
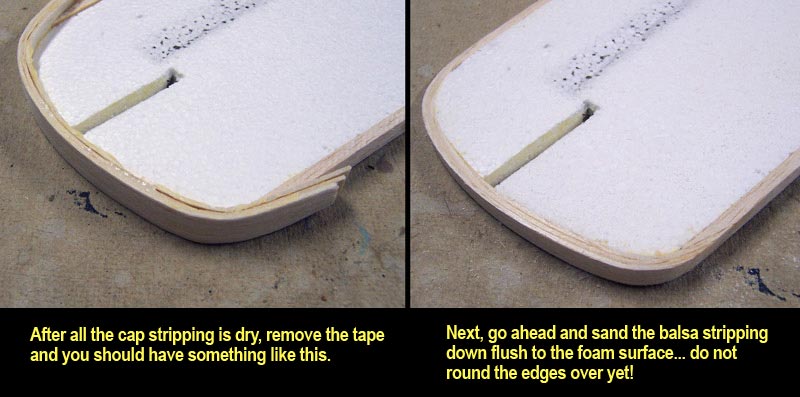
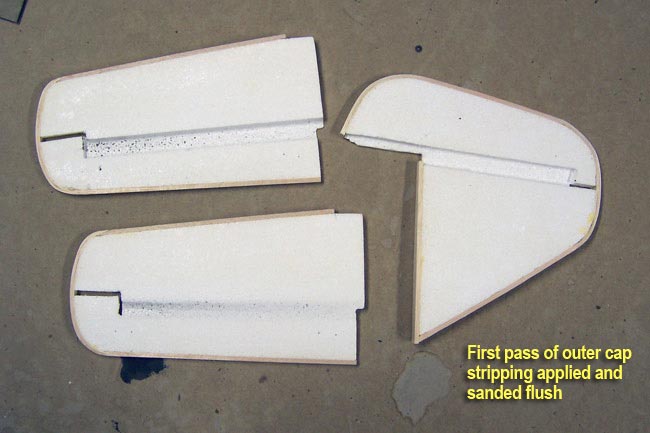
Sanding the caps
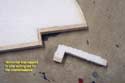
 After drying, you can remove the tape and begin sanding the cap stripping down flush with the foam surfaces. Do not round the edges over yet, you'll need to do sheeting first, and add another pass of cap stripping before rounding. You also want to go ahead and sand the top and bottom faces of the foam parts now so that they'll be ready for gluing the sheeting on later. After drying, you can remove the tape and begin sanding the cap stripping down flush with the foam surfaces. Do not round the edges over yet, you'll need to do sheeting first, and add another pass of cap stripping before rounding. You also want to go ahead and sand the top and bottom faces of the foam parts now so that they'll be ready for gluing the sheeting on later.
|
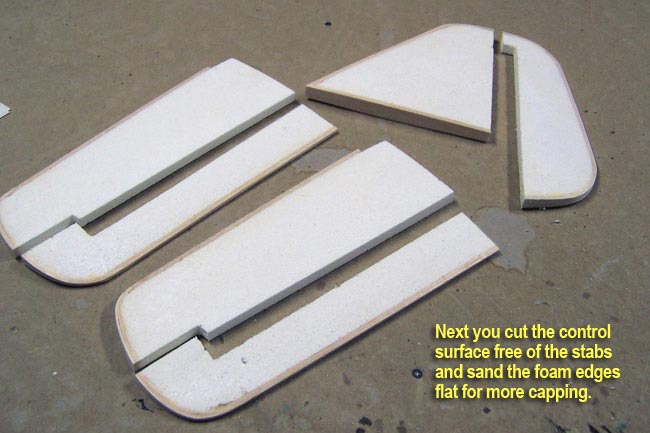
Capping the Leading & Trailing Edges
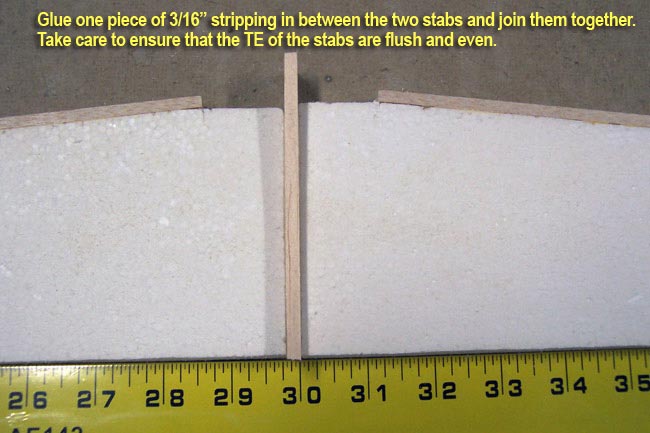
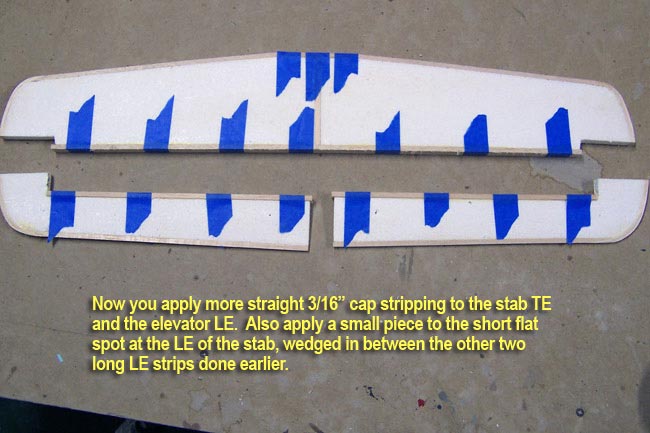
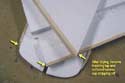
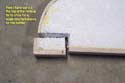
Go ahead and cut the control surfaces free of the stabs and fin now. Use a long sanding block to sand the LE's & TE's flat to receive cap stripping. But, first you'll need to join the two stab halves. Glue one 3/16" piece of cap stripping in between the two stab halves and join them together. Butt them against a ruler or other straight edge to make sure you have an even straight trailing edge on your joined horizontal stab. Now you can get some more 3/16" cap out and do the TE of the stab (one piece all the way across both stab halves), and hit the LE of the elevators with the 3/16" too. You'll have a short blank spot at the LE of the stab where it goes inside the fuse.
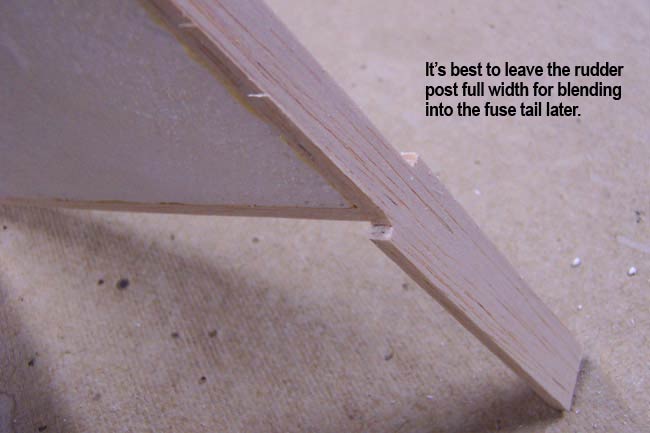
Go ahead and wedge one small piece of stripping across the joint in between the two longer strips applied to the LE of the stabs earlier. Lastly, you'll use some 7/8" wide by 3/16" cap stripping on the TE of the vertical fin and TE of the rudder. Use the hardest/stiffest piece of stock you can find in your kit to do the TE of the fin. Make sure that you cut the piece on the TE of the fin about 4 inches longer than the fin and let the excess hang down below the fin to tie into the back of the fuse later. I also leave the 4 inch extension at full width when sanding the rest of it flush to the fin. This will help in blending it into the tail of the fuse later.
|
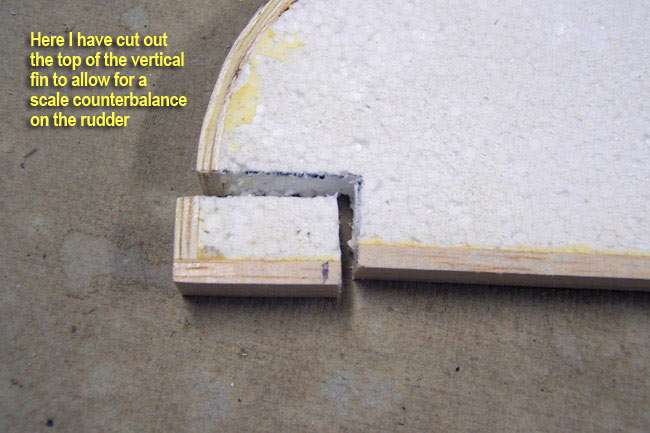
Counterbalances & last bit of capping
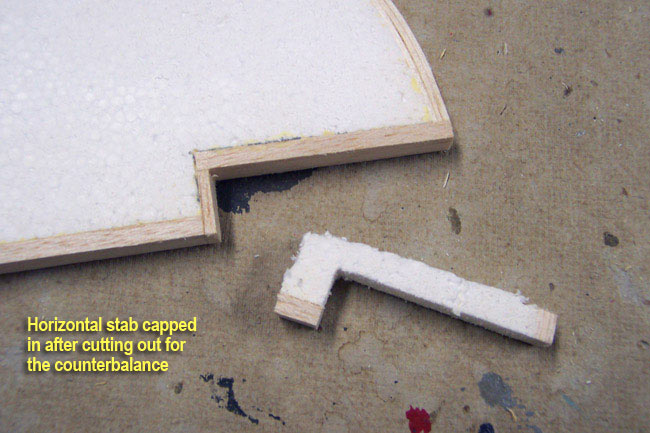
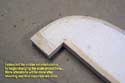
I decided to go for a little more scale-accurate with the counterbalances on the tailfeathers, so here are the optional steps I took.
First, I used my 3-views to determine the approximate size that I felt they needed to be, then marked them out on the components to be altered. Don't forget, when you measure, you need to allow for the additional thickness of the next pass of cap stripping to be done after sheeting.
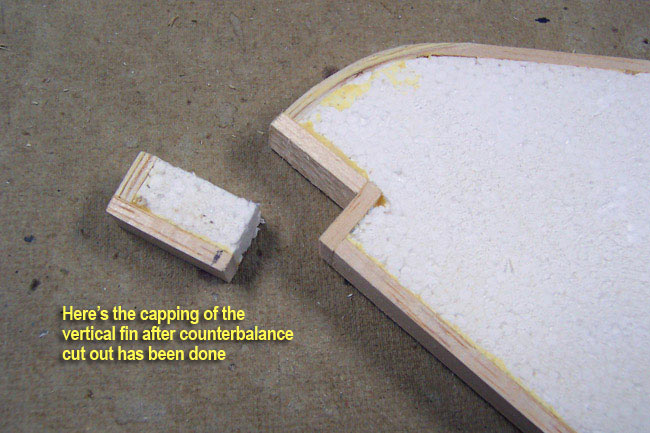
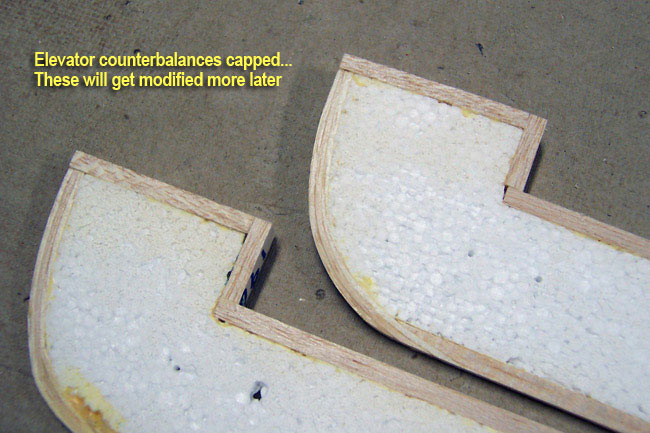
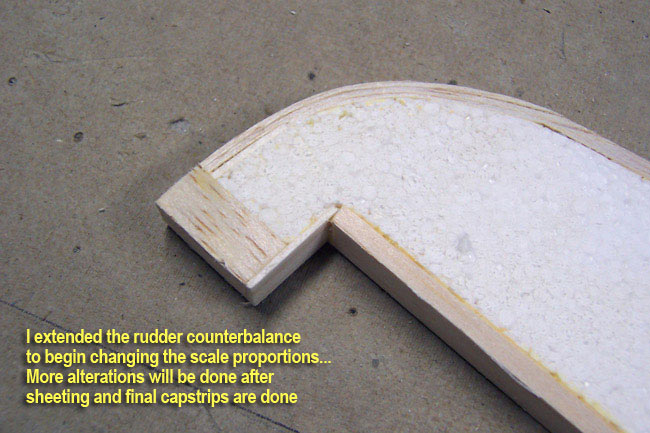
Once I had cut the unwanted areas out, capped them with balsa and began building up the actual counterbalances themselves, which would get further capping after sheeting. Next, it's time to begin the sheeting process on the tail. |
|