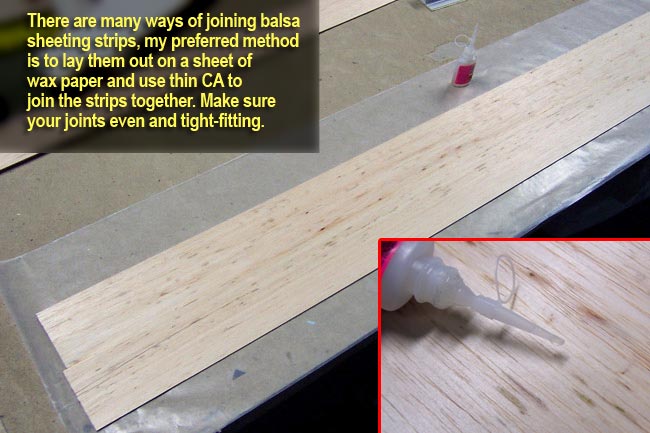
Most of your sheeting on this plane will obviously require 1/16" balsa sheets more than 3 or 4 inches wide, so you'll need to join up some sheets before applying them to the plane (don't try to join them "on" the plane... glue them together first).
There are a number of ways to do this, I prefer to lay them out on a sheet of wax paper and use thin CA to join them together. However you do it, after the glue dries, be sure to sand them down flat on a table to get a smooth even surface.
One of the most important keys to success here is to make sure you have good flush, tight fitting joints between the sheets. One good way of doing this is to have a long piece of angle iron/aluminum (L-channel) with sandpaper on one side of it. Lay it on your bench with the sandpaper portion sticking up vertically, then butt the edge of your sheeting against it and slide it back and forth. This sands the edge straight and true using the angle stock as a fence.
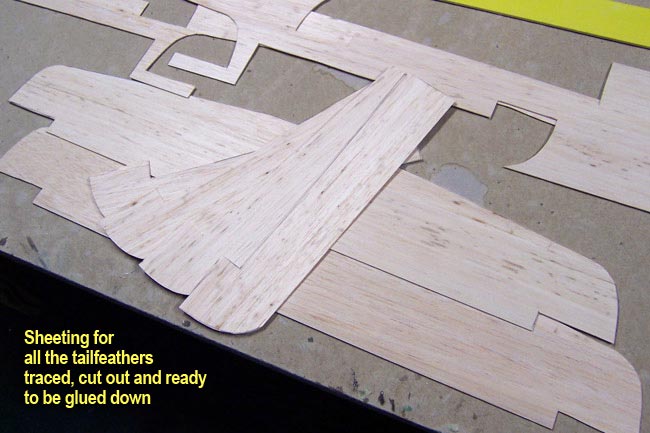
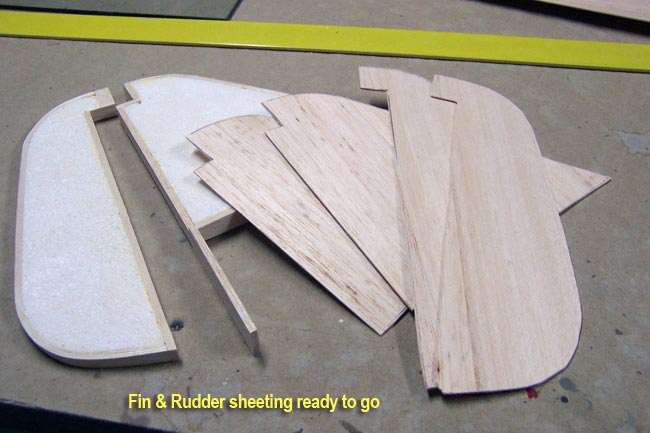
Once you have your sheets joined up wide enough to cover your surfaces, you can lay the parts down on the sheets and trace them out with a pen. Now all you have to do is cut the traced pieces out of the sheeting and you're ready to glue them down. Make sure your tail components are sanded well before applying glue to them.
Applying the sheeting
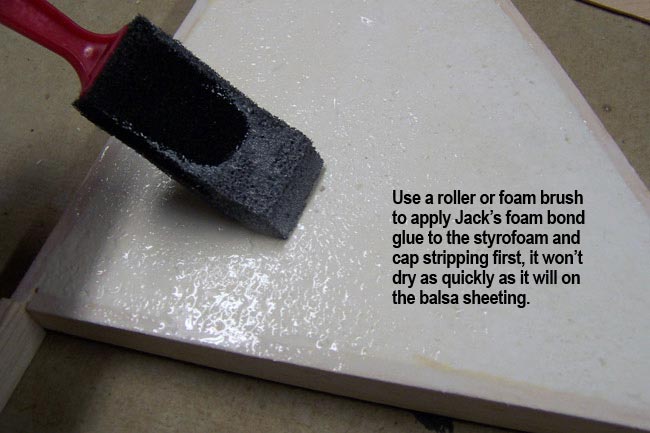
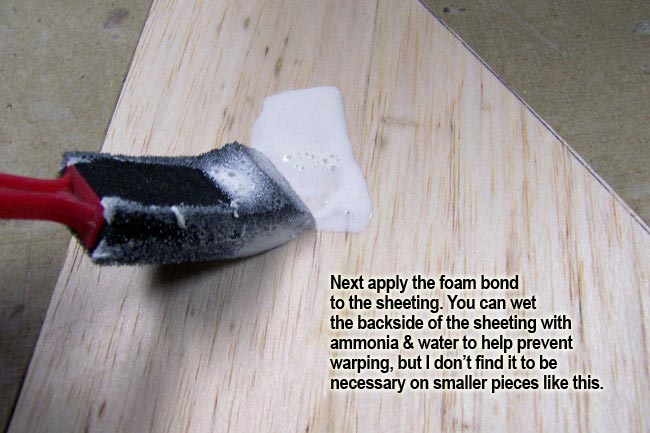
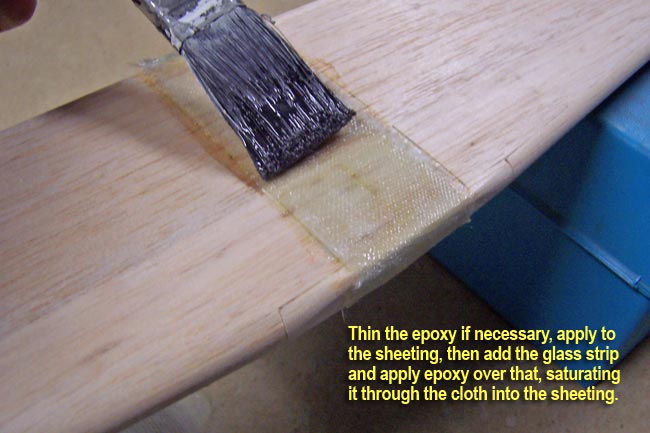
Using the Foam Bond glue that Jack suppllies with the kit, I applied it to the tail components with a foam brush... you should use a small paint roller for larger parts like the fuse or wing. Be sure to apply the glue evenly over all the foam and out onto the cap strips. Do the foam parts first, then the sheeting second. This is done because the foam doesn't pull the moisture out of the glue as quickly as the balsa sheeting will. Allow the glue to dry to a tacky touch before applying the sheeting to the foam. Make sure you have dry fit the pieces first and work from the center outwards when applying the sheeting.
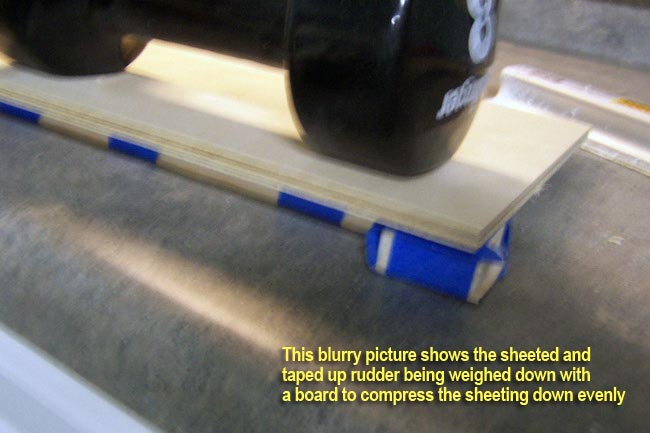
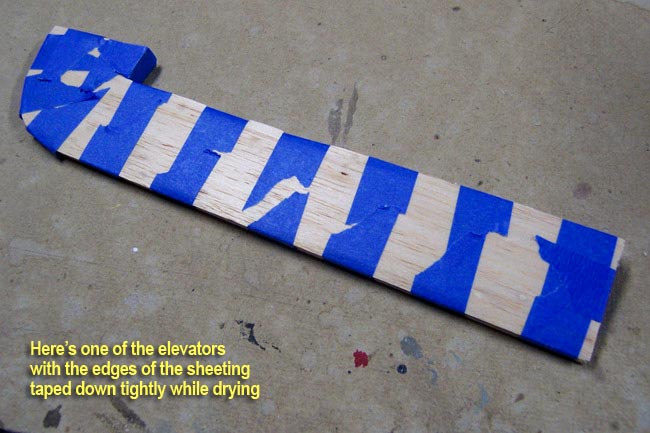
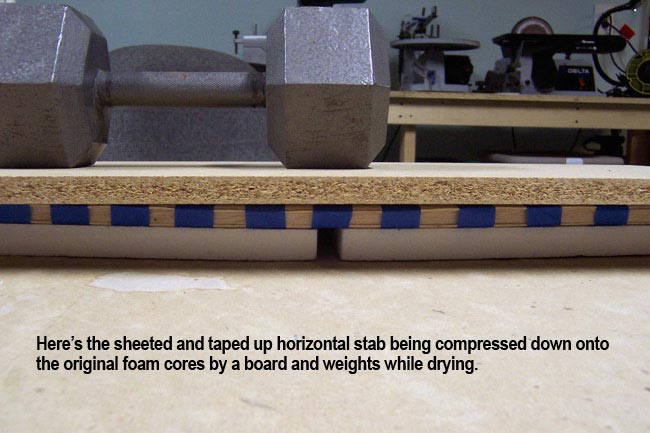
Once you have the sheets glued to both sides of a component, it's best to use tape to draw it down tightly, much like pulling a bed sheet tight and tucking it in! I also try to weigh the whole assembly down flat on a table to push the sheeting tightly and evenly onto the foam, and, ensure that it will dry without bubbling or warping the component. Whenever possible, I like to return the component back into it's original foam core, making a contoured sandwich that can be weighed down as shown below.
IMPORTANT TECHNIQUE TIP
The Foam Bond glue you are using in this step should be applied much like a "contact cement" is applied. Again, apply the glue to the foam first, let it slightly dry then put the glue on the sheeting. Once all glue has dried to the point that you can touch it without it coming off on your finger, you can then assemble. Once the glue has fully dried, the two coats bond into one and form a very strong joint. Adding the tape and weight provides a little extra insurance that everything will stay down flat.
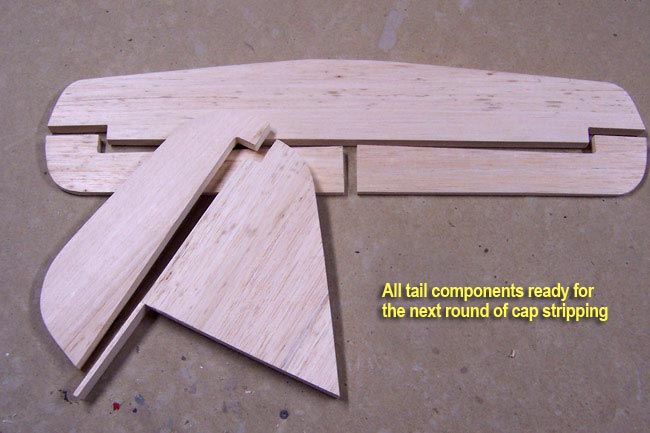
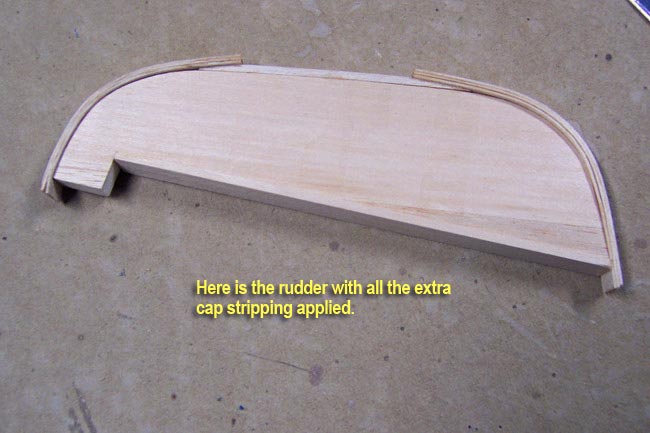
Cap stripping round two
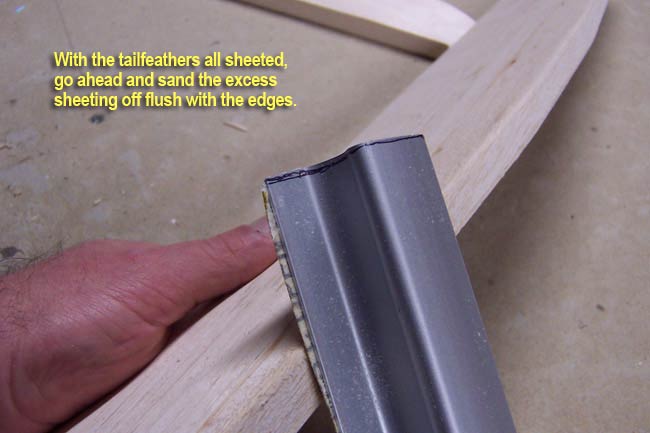
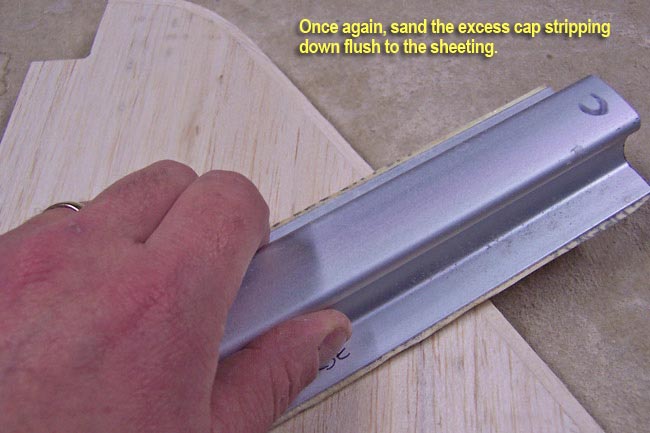
With all of the sheeting applied and sufficiently dried, you can now go ahead and use a sanding block to sand all the excess sheeting stock down flush to the cap stripping. Do not begin rounding your edges yet... still not time for it.
To help you better understand this fundamental building technique for all of Jack's kits, I have put together the little Flash animation at the right that shows the concept of what you are shooting for. The application shown here goes for all perimiter edges of your surfaces (counterbalances may require special treatment for best fit).
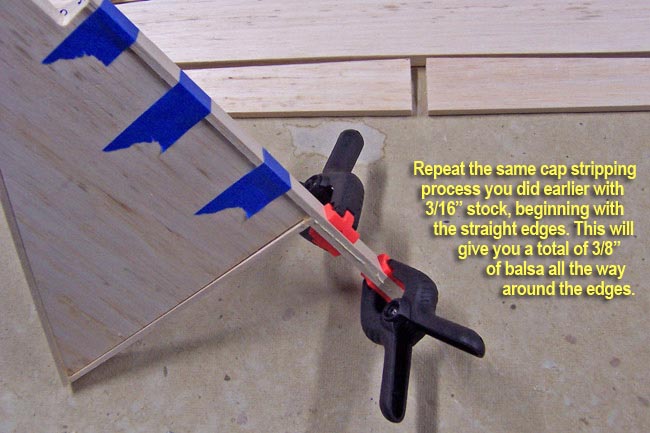
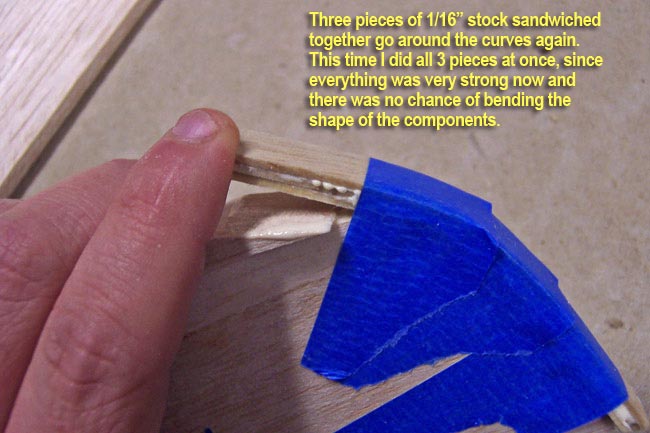
You now can begin adding your second (and last) pass of 3/16" cap stripping around your surfaces following the same methods as done in the first round. You'll find it's much easier now that the surfaces are much stronger and more rigid from all the balsa now glued onto them. As a matter of fact, I found that applying all three 1/16" strips at once on the round corners was very easy now.
Actually, on a few of them, I applied them in a flash by just doing them one at a time with medium CA glue. Now that the foam is protected, there is no danger of harming it with the medium CA. Be careful with any thin CA though, it may soak/seep back into the foam and swallow it up. However you decide to apply them, you should end up with something like the animation above and photo here at right illustrate.
Sanding & rounding the edges
You've now got 3/8" of balsa around all perimiter edges and 1/16" balsa skins on top and bottom, so it's time to shape things up a bit. There are a lot of ways of doing this, and it's largely a matter of personal preference.
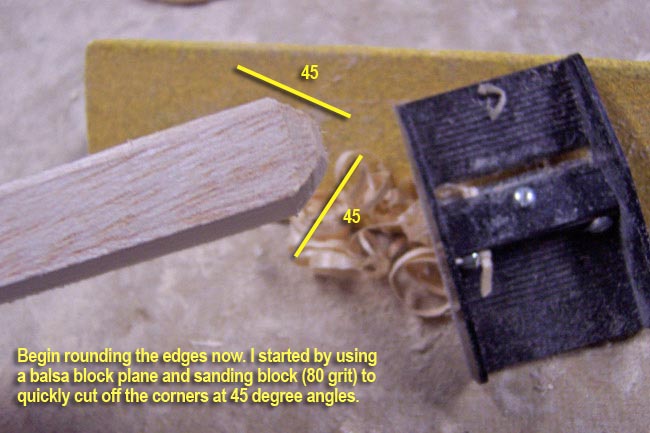
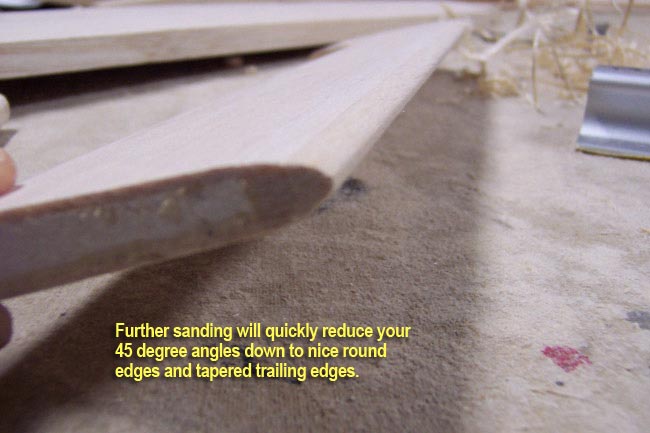
I usually start by using a small balsa block plane and 80 grit sanding block to cut the edges at 45 degree angles as shown at left. Then I use the sanding block again to hit each of the 45 degree corners, cutting the angles down to multiple 20-25 degree angles. Then you can just start smoothing them all out to make them nice and round or tapered. Another good way to really get them nice and symmetrically round is to use the "shoeshine" technique" shown below.
TECHNIQUE TIP
The "Shoeshine Technique" is quite simple. Just place the piece to be rounded between your knees and use a 6-8 inch long strip of sandpaper held at each end to brush back and forth over the edges. The motion should be just like you were shining shoes and will give you a very smooth and symmetrical round edge.
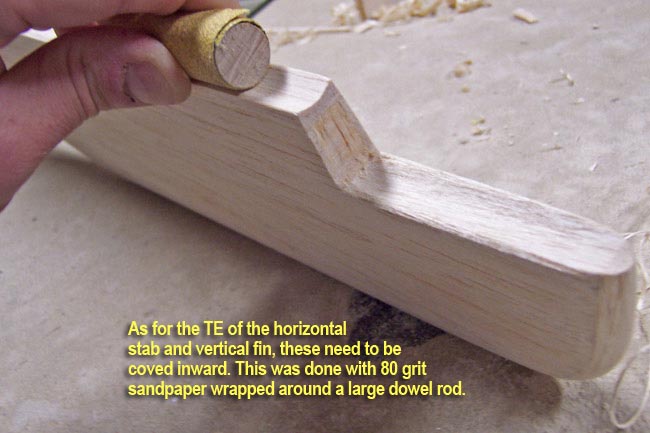
The trailing edges of the horizontal stab and vertical fin need to be coved inward, so the technique applied here is a little different than the other edges. The inward coving will allow the leading edges of your rudder and elevator to recess into the cove, sealing the hinge gap and getting your hinges almost completely out of visibility. The technique is as simple as wrapping a short piece of a large dowel rod with 80 grit sand paper and running it back and forth on the edges.
Finishing up
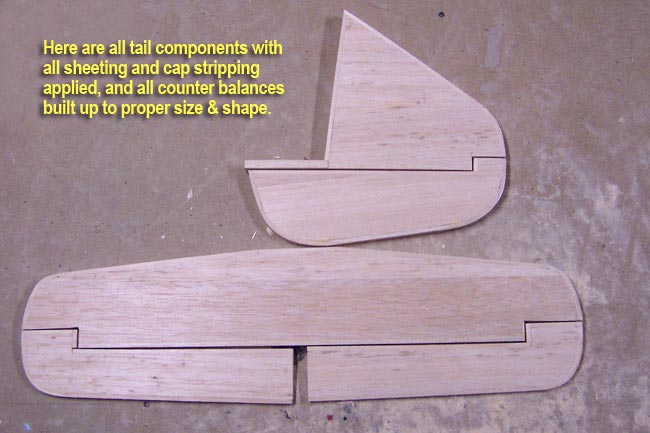
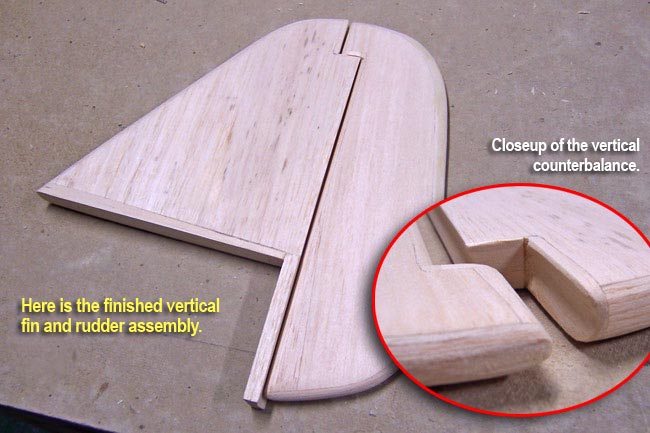
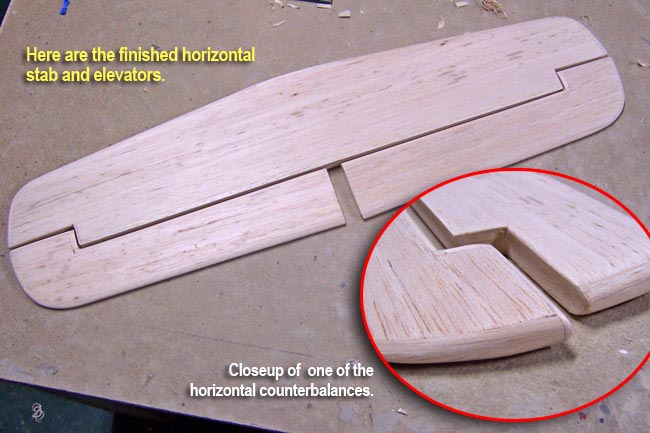
That's pretty much it, a little finish sanding with some finer grit paper and you've got some nice and smooth, light weight, and very durable tailfeathers. The construction of the counterbalances is optional and just requires some decent 3-views, a ruler & calculator, and a little scrap balsa to do them up right. I'll cover hinging and installation of the tailfeathers much later after the fuselage has been built.
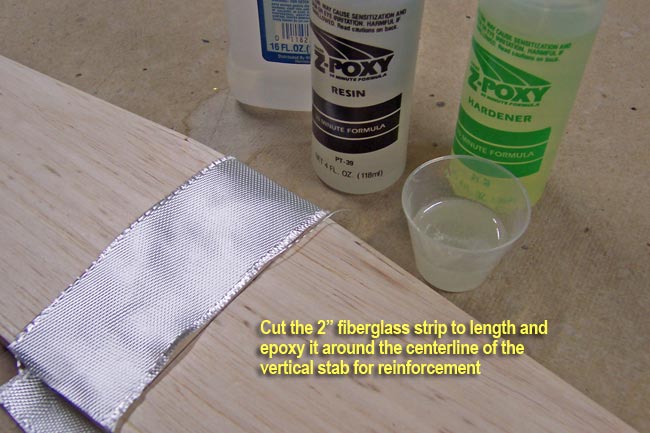
The last step is to add the fiberglass reinforcement strip on the horizontal stab. In your kit, you will find two pieces of heavy fiberglass cloth, one is 4-1/2" wide and the other 2" wide. Get the narrower 2" strip out and cut it to a length that wraps all the way around your horizontal stab. Measure in from the tips of the stab and mark the centerline on top and bottom.
Next you will need to mix up some 45 minute epoxy, and you'll probably have to thin it down some. I normally use acetone to thin my epoxy, but I don't want to get acetone anywhere near foam, so I used alcohol instead. It will do the same thing, but for some reason it seems to cause the epoxy to "kick" way too soon and you may only get 10-15 minutes of working time with your epoxy if you use too much alcohol!
Apply the epoxy to the stab, top and bottom, about 1 inch on each side of the centerline. Wrap the 2" cloth around it and press it down into the epoxy. Then, quickly brush on another coat of epoxy on top of the cloth so that it soaks down into the first coat. Make sure everything is snug and flat, let it dry, then sand smooth. Make sure you don't cut through the cloth when sanding it down. That's it, your tail is done... for now.
In case you are building this same kit and are keeping track of weight along the way (like I usually do), here's what my finished tailfeathers came up at. Completely built and sanded, with all counterbalance build-ups added, and the 2" fiberglass strip added to the stab centerline, they weigh a total of 8.2 ounces. Is that good? I have no idea. Hopefully that's not too much heavier than what the rest of you are getting! ;-)