|
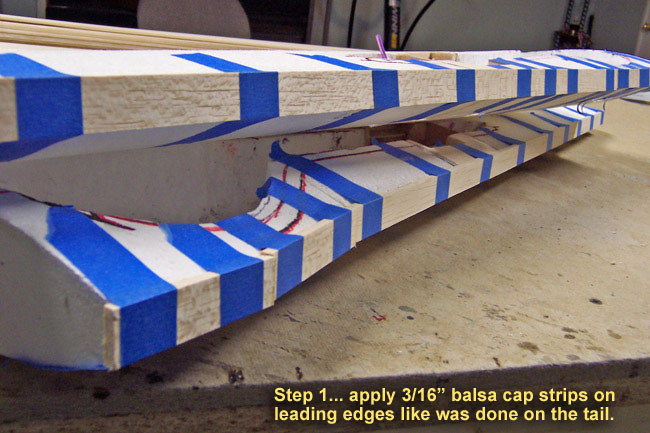
Applying the straight cap stripping
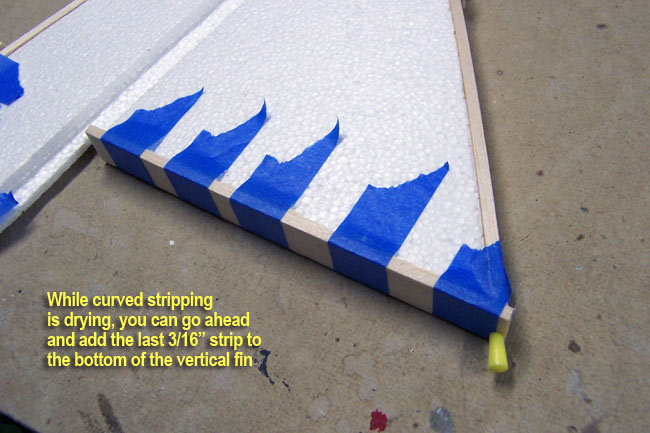
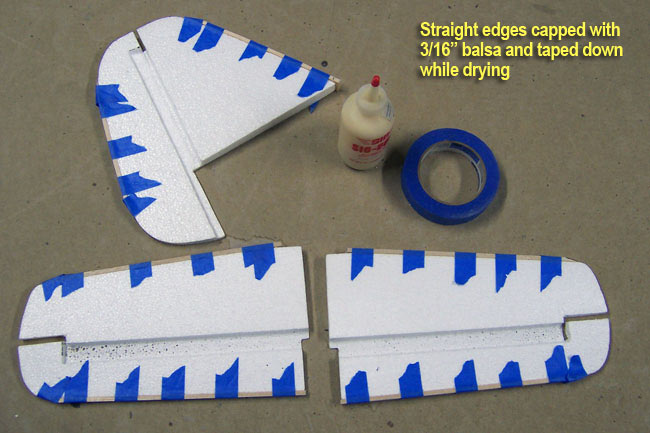
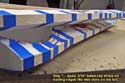 Cap stripping the wing is done using the same steps as was done on the tail earlier in the build, so I won't bore you with the redundant details. However, here are a few highlights that should cover any questions that you may have regarding the steps I took. To start off, you use the 3/16" balsa strips to cap the straight leading and trailing edges like you did on the stab and rudder. I suggest using Alyphatic Resin for this step, then tape the strips securely to the wing while they dry. Cap stripping the wing is done using the same steps as was done on the tail earlier in the build, so I won't bore you with the redundant details. However, here are a few highlights that should cover any questions that you may have regarding the steps I took. To start off, you use the 3/16" balsa strips to cap the straight leading and trailing edges like you did on the stab and rudder. I suggest using Alyphatic Resin for this step, then tape the strips securely to the wing while they dry.
|
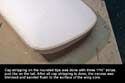
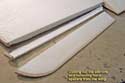
The thin trailing edge was a big concern of mine as I was worried about keeping it straight. The TE of the foam was barely 1/16" thick and really wasn't holding a straight edge on its own, so this looked to be a challenge. However, it really was no big deal.
I just laid the TE of the wing as flat as it would go on a good flat building board, and glued the thin strips of 3/16" balsa capping to it, securing with tape. You can lay some weigh on the TE of the wing to hold the assembly down flat while the glue dries and it comes out nice and straight. |
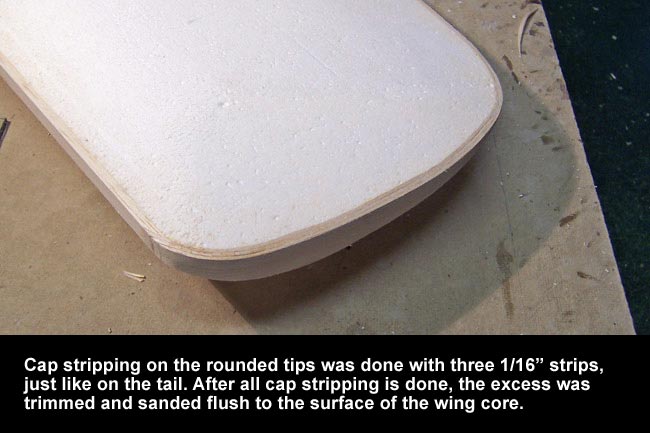
Curves and sanding
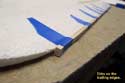
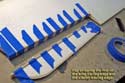
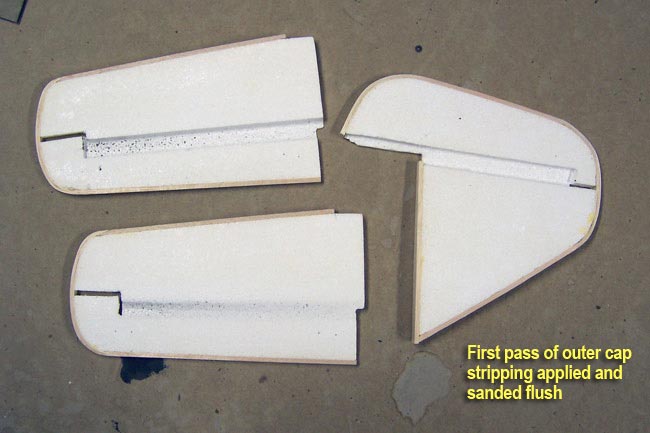
 Capping the rounded ends of the wing was also done just like the tailfeathers. Use three strips of 1/16" balsa capping laminated around the ends to form the curve. Again, you can use a few sprays of the ammonia/water mixture to assist the balsa in softening up and bending around the curves. Capping the rounded ends of the wing was also done just like the tailfeathers. Use three strips of 1/16" balsa capping laminated around the ends to form the curve. Again, you can use a few sprays of the ammonia/water mixture to assist the balsa in softening up and bending around the curves.
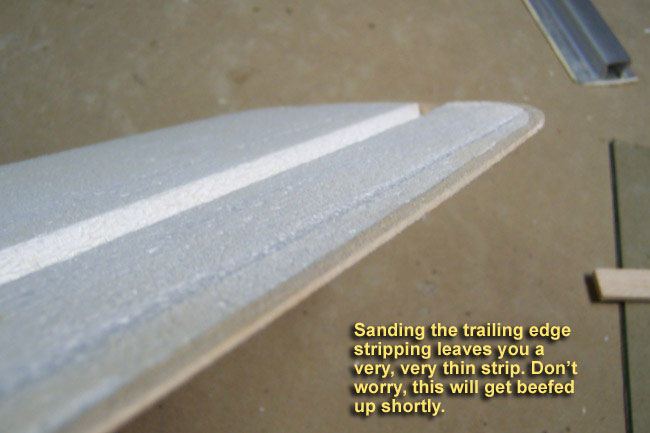
After capping is complete, go ahead and sand the strips down flush to the top and bottom surfaces of the wing. This will leave you a very thin trailing edge, but it will get built up further in future steps.
|
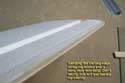
As you can see above, the trailinge
edge of the wing came out quite square.
|
| |
|
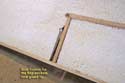
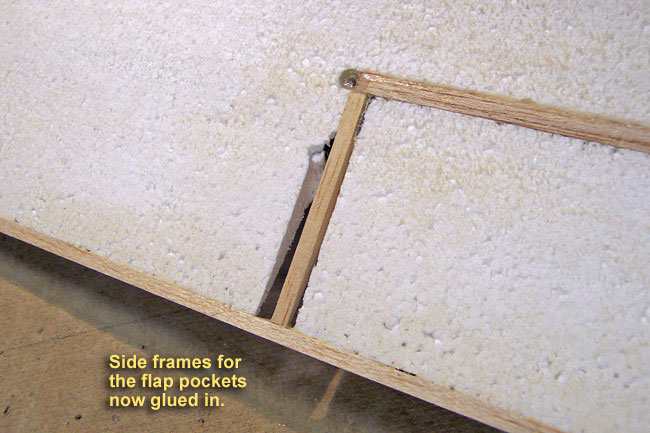
Boxing in the pocket
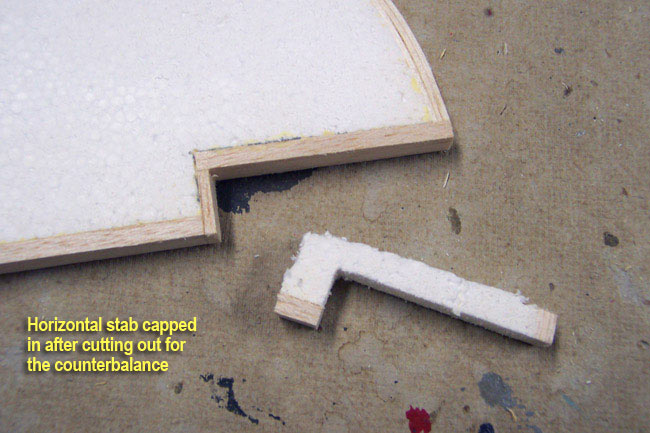
This is a short step... just cut a wedge of 3/16" balsa strip and epoxy it into the slot between the aileron and flap pocket. This will allow you to form an enclosed, boxed in pocket for the split flaps later. Sand the wedge down flush to the shape of the wing.
My advice here is to only epoxy this piece at the two ends, not on the sides where it meets any of the flap or aileron foam area. |
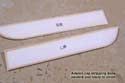
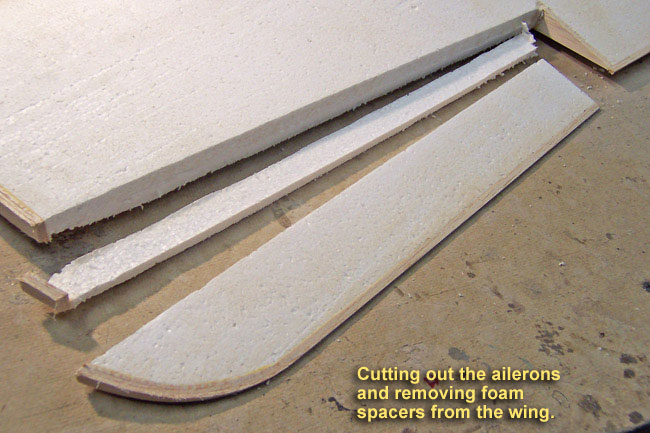
Capping the ailerons
With the ailerons partially capped, go ahead and cut them out of the wing, removing the excess spacer styrofoam beteween the wing trailing edge and aileron leading edge. This space was there to allow for the additional cap strips that will get added in this area.
Now, go ahead and apply the 3/16" cap stripping to the bare leading and trailing edges, secure with tape and allow to dry.
Once all is dry, you can sand everything flush and you're pretty much done with your first round of cap stripping... piece of cake!
|
|
|
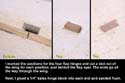
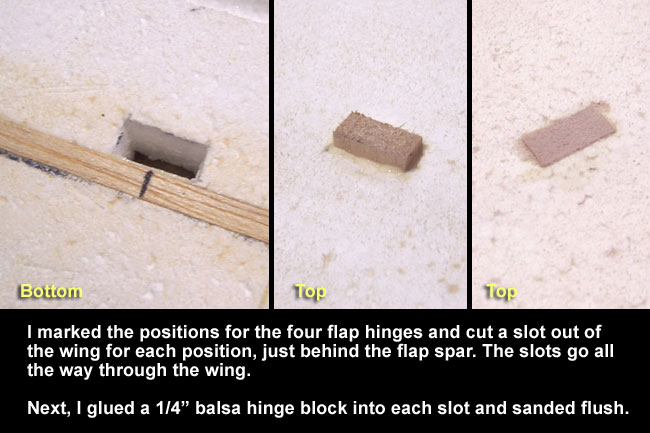
Flap hinge blocks
You now need to determine where your large robart hinge points (or hinges of your choice) will go for your flaps. The kit calls for four hinge points which I evenly spaced across the flaps. I drew up a rough layout of how I intended to build up the flaps, allowing me to figure out all my hardware positioning and have a template that would show me the hinge positions after sheeting.
Next at each of the four points for each flap, I cut out a rectangular hole all the way through the wing, centered at each hinge point, and flush against the backside of the flap spar. Then using 1/4" balsa stock, I slid hinge blocks down into each hole, securing them with epoxy. Lastly, I sanded each block down flush with the top and bottom wing surfaces. |

|
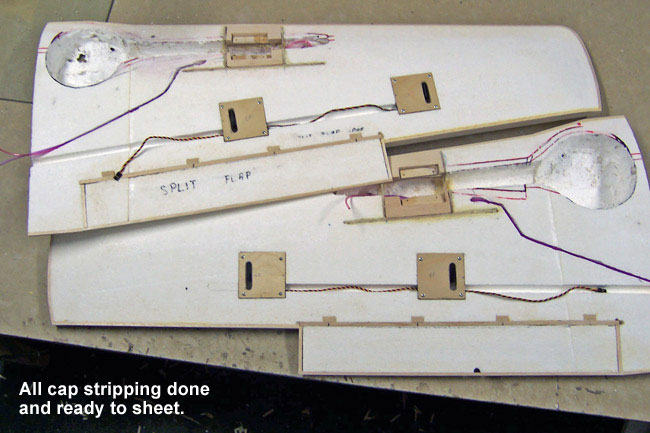
Ready to sheet
That's pretty much it for now, "round one" of the wing cap stripping is now complete and the wing is just about ready to sheet. I have a few minor prep steps left which I'll cover in the next section. |
|


