Nov 28 , 2006


Chartpak Tape

To produce panel lines on this project I will go through a process of masking the lines, building up several coats of primer over and around them, then removing the mask to leave "grooves" that will simulate the various panel lines.

For "butt-joint" panels like the ones used on the FW190, the best method and material to do this with is ChartPak Graphic Tape. My ChartPak tape is supplied by Bill's Blueprint, Inc. in Everett, Washington. You can order this tape by clicking on the banner ad above or clicking here.

True scale width for these panel lines (at 1/5 scale) would be less than 1/64 inch, but it is very difficult to maintain those lines after painting when using tape that thin. I use 1/32" tape to give me lines that are still cleanly visible even after several color and clear coats.


SandBlaster sanding sponges like these shown above are a
great addition to your bag of tricks and have completely
replaced "wet sanding" in my shop.


Sanding Sponges

Another important "tool" that I use when making panel lines are SandBlaster sanding sponges, which I purchased through my local Lowe's hardware store.

These sponges come in a variety of grits, shapes and thicknesses. I use 150, 320 and 400 grit sponges most of the time.

These sponges cut primer like nobody's business and don't plug like sandpaper. When they do start to fill up, you can bang them together like chalkboard erasers to clean them out. Or just hit them with the hose of a ShopVac to really clean them out.

They are stiff enough to sand flat like a sanding block if you don't push too hard on them. Yet, they are flexible enough to go around curves and contours without cutting the peaks to quickly.

A newer version of these is the long 400 grit sponge that is only about 1/8" thick and has a "waffle like" pattern to it. The holes in the waffle pattern help keep it from plugging up. This stuff works great for my final sanding of primer coats.


Wing panel lines

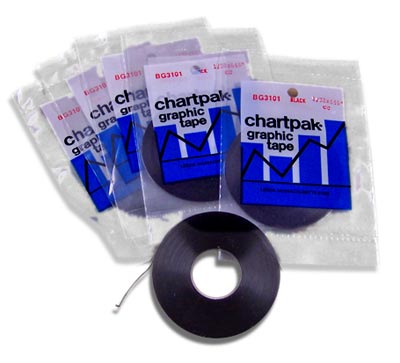
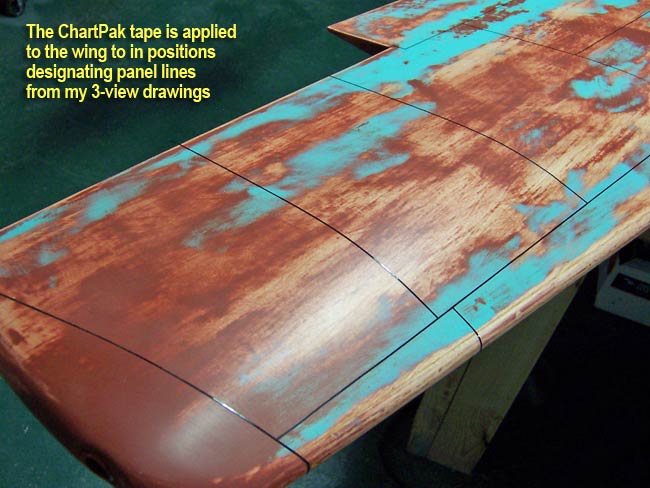
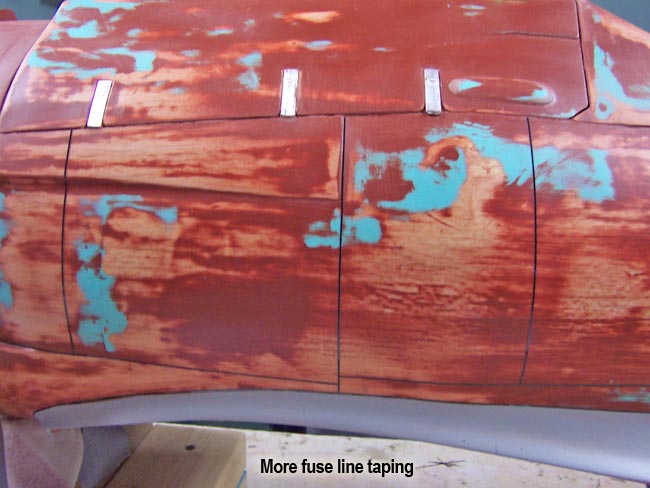
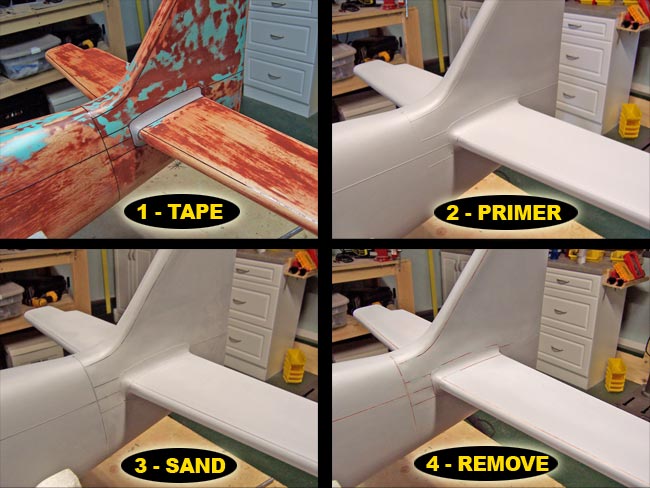
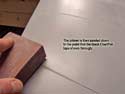
OK, let's get started. First, I started the wing panel lines by following my 3-view drawings to position the ChartPak tape where all the panel lines should be. This stuff is quite easy to work with and sticks very well.

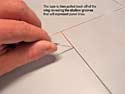
Just use a very sharp hobby knife to trim it to length and take your time. You can usually reposition the tape at least one time if adjustment is needed. After that, you should just cut a new piece as the adhesive loses its tack.

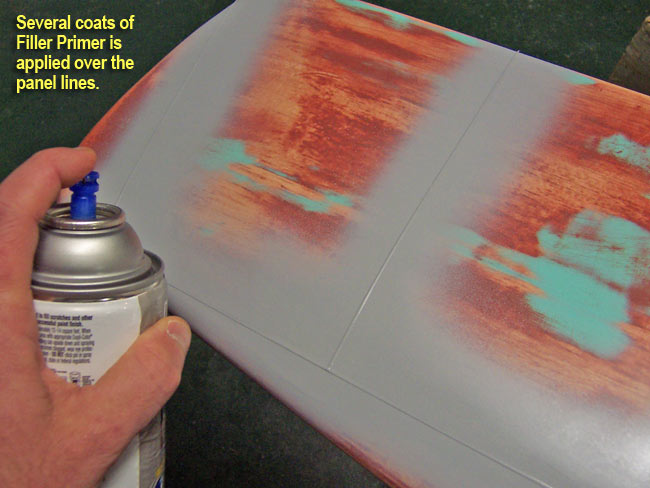
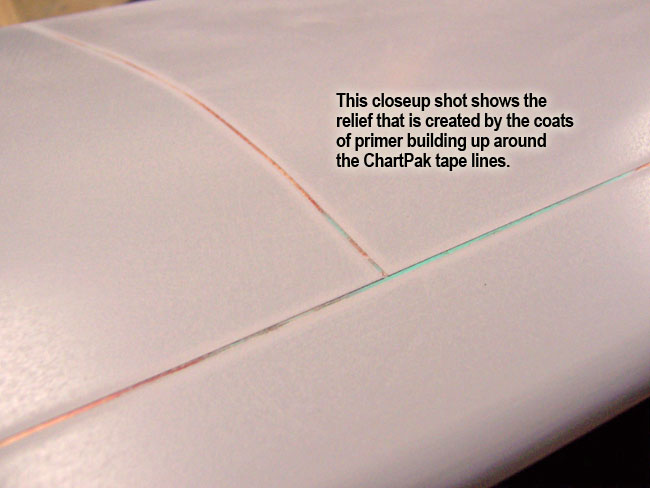
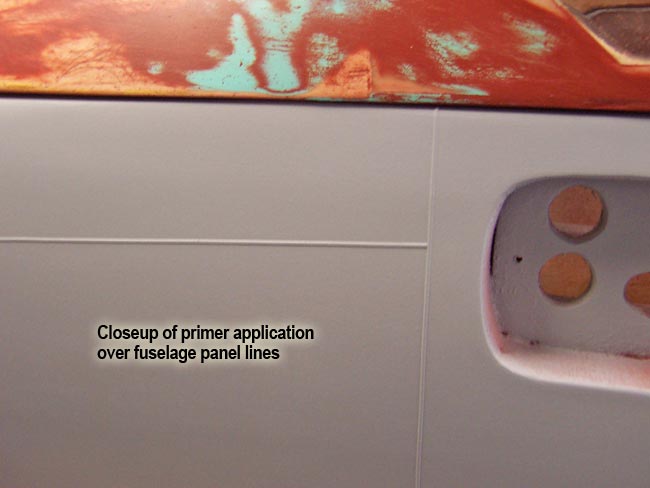
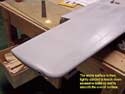
Once all the lines are in position, I apply several coats (about 4-5) of my Filler Primer to begin building up the surface level around the lines. I paint a line of primer right over each panel line, feathering an inch or two on either side. No need to add these coats on the rest of the wing, it will just add too much weight and cost a lot more to do!

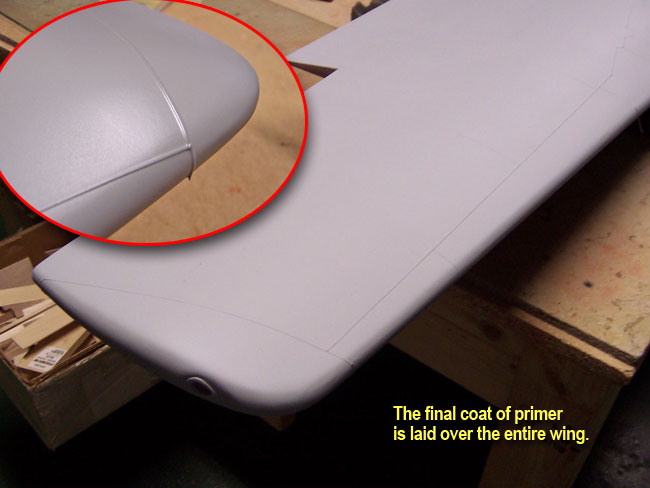
Once you have the primary panel line coats down, you can then add one more liberal coat to the entire wing surface. This will be the last of your primer application. Once that has dried sufficiently (I wait overnight so it sands easier/cleaner), you can start sanding.

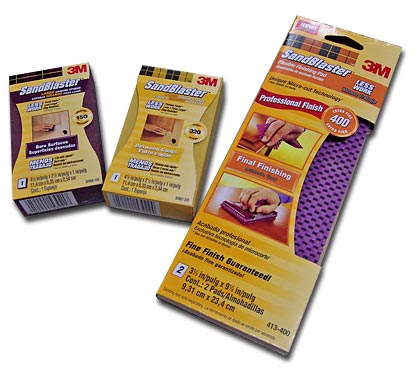
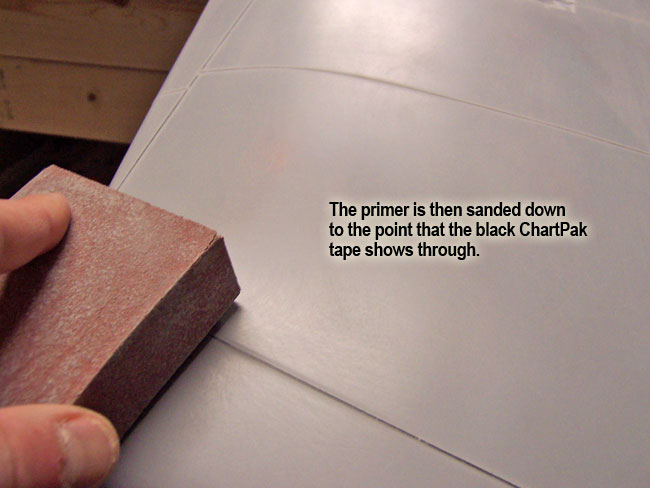
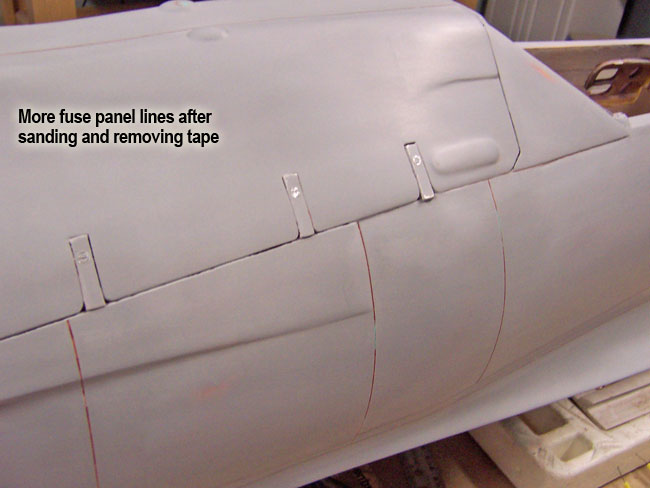
I use a 150 grit sanding sponge to sand the primer down over the panel lines until the black ChartPak tape is clearly visible. This lowers the panel line surrounding surface down to one consistent level and depth, and also will make the tape pull up cleanly.

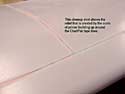
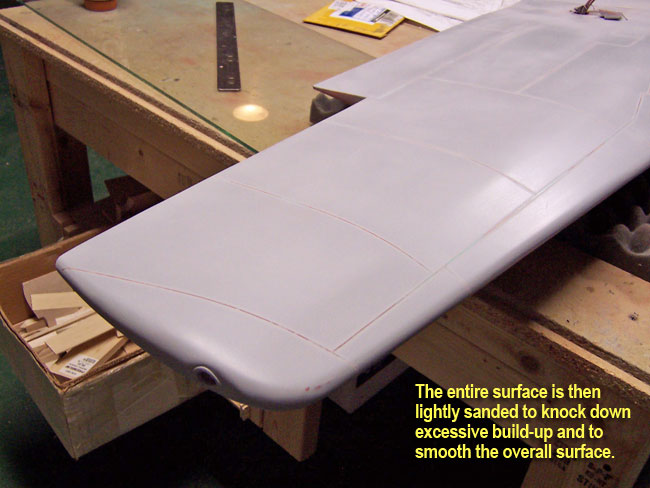
Next I get out my 320 grit sponge and sand the entire wing lightly to remove any sanding scratches. Now I go ahead and begin pulling the tape up on the whole plane. Once that is up, I lightly sand again with the 320, followed by a final sanding with the thin, 400 grit waffle sponge.

You may have to go around and clean up some of the panel line grooves as the adhesive sometimes sticks to the plane when pulling up the tape. I use the then flat edge of a small hobby file and the adhesive just rolls up into a ball and falls right out of the grooves.


Areas that were previously built up using primer, such as the gun and wing fairings, will need some special attention. You'll need to use the ChartPak tape to outline them again, or else the primer applications will fill in around their edges and flow the panel edges out of existence.

That's pretty much it, just do the same steps on both the top and bottom sides of the wing and you'll have some great panel lines that will still be visible after final painting.

Note that the last primer coat, which covers the entire wing surface, only needs to be thick enough to evenly cover the surface. No build-up is needed, and it should be sanded down until you can almost see the wing showing through.

Fuselage panel lines

As you can probably imagine, the fuselage panel lines are done using the exact same techniques and materials as done on the fuselage.

Here are some photos at right of some of the areas of the fuselage as I applied the panel line tape, primered, sanded and removed.


Review of the process

Use the photos here to quickly review the 4 step process, as demonstrated here on the tail area.

Just apply ChartPak tape, shoot 4-5 coats of high-build Filler Primer, sand down to the tape, remove the tape and you're ready for final sanding.

Next I will begin the second phase of adding surface details to the wing.


"wing guns & details"


| Scout Recon | Building the 190 | Paint & Detail | Cockpit | On Patrol |

back to tompierce.net - rc planes